Category: Vegan made Easier

  • The Motherload of Advice for Saving Time in a Plant-Based Kitchen – 30 Ideas from Vegan Pros

    The Motherload of Advice for Saving Time in a Plant-Based Kitchen – 30 Ideas from Vegan Pros

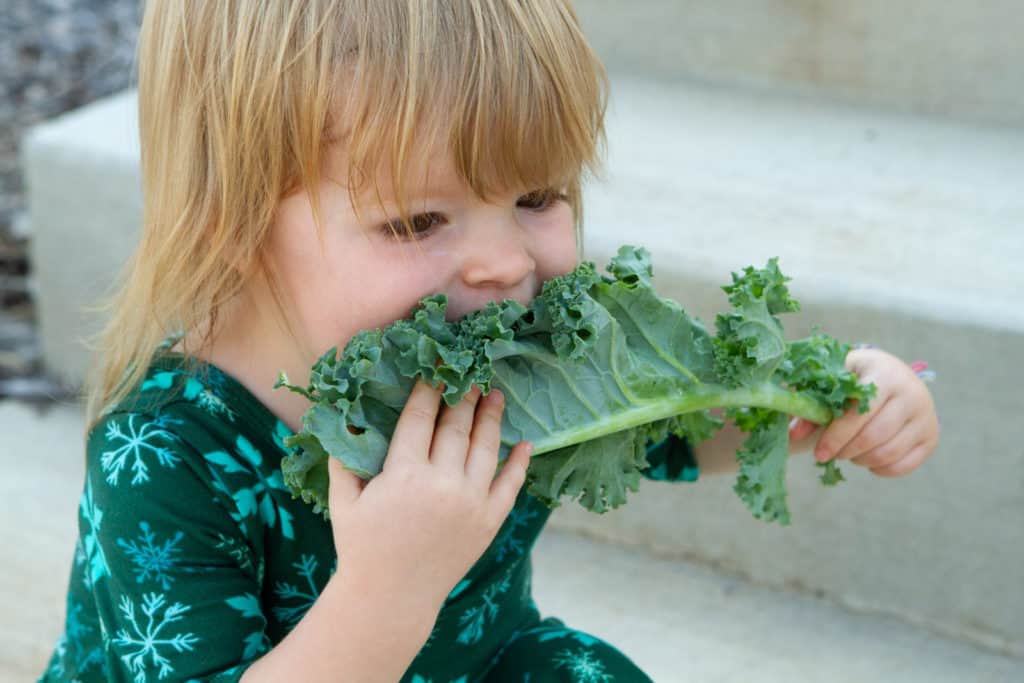
    Recently a mother posted on my Facebook group, desperate for advice. She homeschools her kids and was trying to stick to a whole food plant-based diet but spending 4-5 hours a day in the kitchen was just not working!

    She was flooded with great advice from the pros. I’m not talking about dieticians here. I’m talking about the real pros in this area: busy moms with hungry kids who are making a healthy diet a priority without letting it eat up all their time.

    Combining my best time-saving hacks in the kitchen with the advice pooled from these wise moms gives you more opportunity to take what fits your lifestyle and leave the rest.

    First, Know This

    Cooking real food takes longer than hitting the drive-thru or buying frozen pizza. It just does! So set your expectations accordingly.

    If you’ve been saving time through grabbing processed convenience foods, you’re not alone! Close to 50 million Americans used Lunchables last year. Convenience tempts us all, but we tend to only see the convenience that the food companies are selling, and it comes with an awful price for our health and for the planet. We are less well-versed in how to make a healthy diet more convenient in the day-to-day. That’s why we’ve got to help each other out!

    It will be an adjustment to move towards preparing real food. Don’t despair though, there are lots of hacks to give you the most payback for your time in the kitchen.

    Be Wise

    No mom does all this stuff. It may be that just choosing one or two out of the list will make a real difference in your home. So consider your own situation and strengths when you consider these tips.

    Plenty of us just muddle through and feed our family plants, figuring out as we go and that’s perfectly fine! These are just some shortcuts to consider.

    1. Set aside a block of time on the weekend

    It may never feel convenient to devote time to meal prep, but scheduling it and making it a regular thing will take the pressure off those hectic weekday mornings and evenings.

    Increase your productivity further: Set a timer and just bust out as much you can in that time and call it good. That will keep you from procrastinating meal prep with the thought that it will take “forever,” and it’ll keep you focused and hustling for the entire time. Two hours is a good goal. Start with the things that take the longest to cook, keep your oven and pressure cooker full, and bust out the food processor to speed things up.

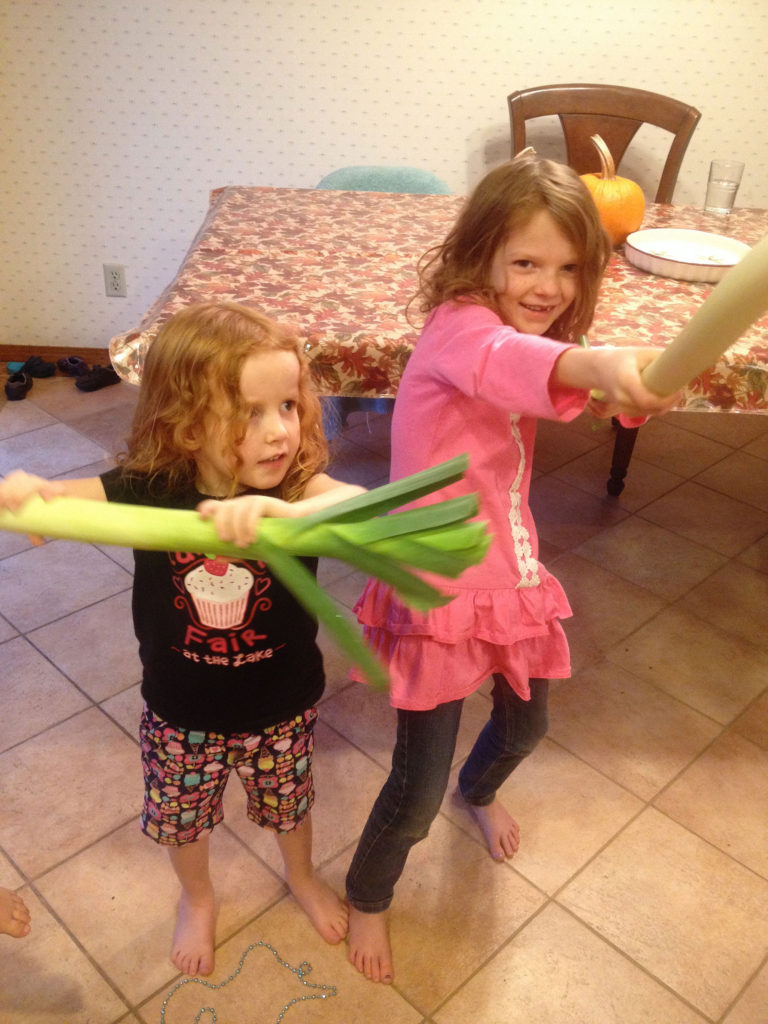
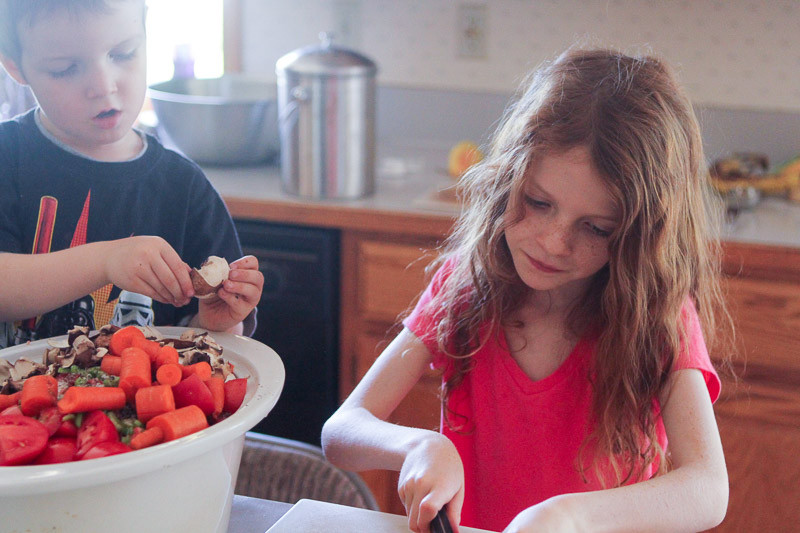
    2. Teach your kids how to contribute

    Lots of mouths can also mean lots of helping hands.

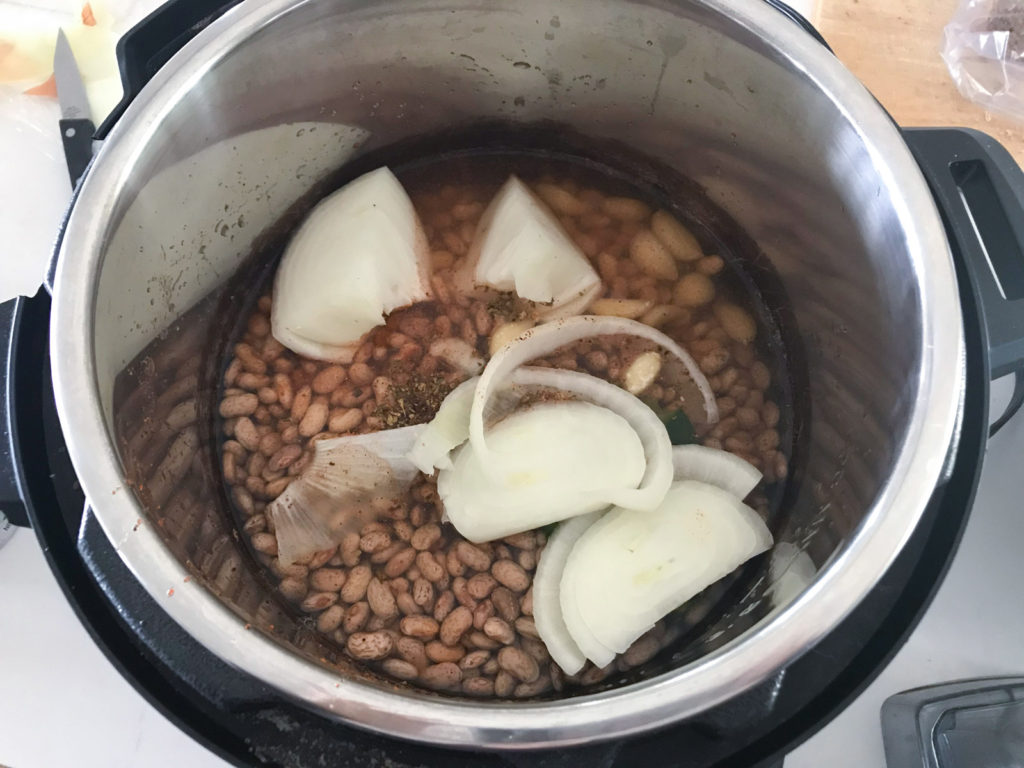
    My little kids wash and tear lettuce, set and clear the table, scoop beans into the pressure cooker, and much more.

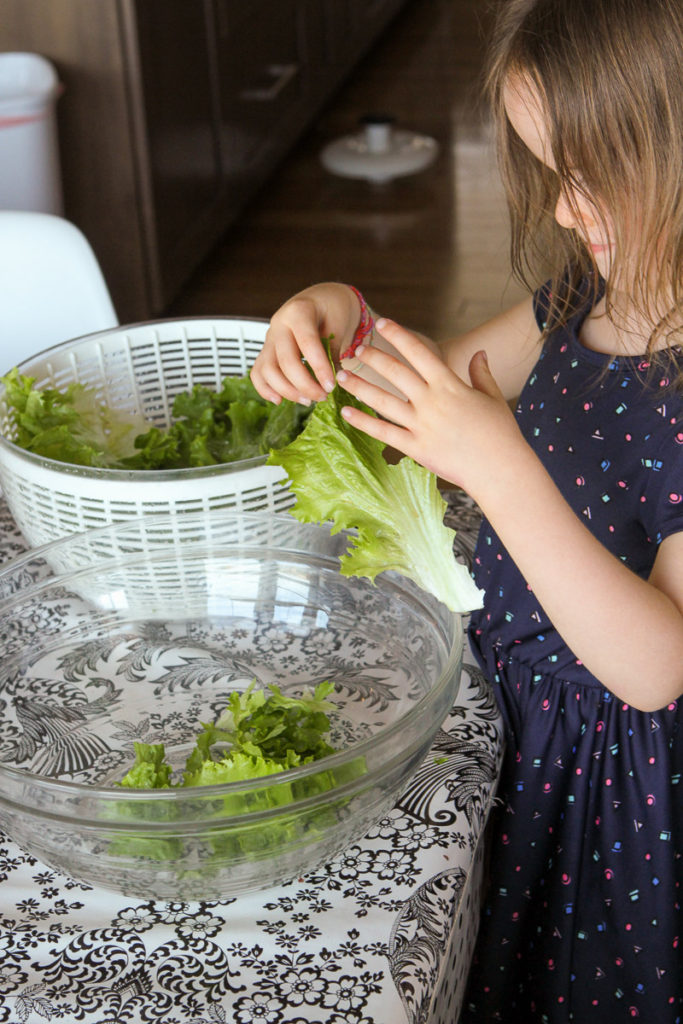
    By 8, they are definitely washing and chopping vegetables and fruits for snacks for themselves and younger siblings. The time investment in involving them pays off down the road, as my 12 year old can pull together a meal with very little help. They’re also familiar with all the things we buy, so they are helpful at the grocery store in picking out produce and filling up our cart.

    Don’t feel guilty for getting your kids to help! They are more likely to enjoy the meal if they pitch in. Plus, it gives them important life skills and a sense of contribution and competence that they find satisfying (even if they grumble a bit.)

    I just ordered these crinkle cutters so my littler kids can get in on the chopping action.

    Also, employ your kids to help clean up after the meal. (Literally employ them if you pay for chores. They’re cheap help!) We all know the dishes and counter wiping add up to extra time in the kitchen. We turn on fun music and clean up as a family. Our 8 year old can do all the dishes except sharp knives and heavy pots, even while the toddler “supervises.”

    It might be tempting to put off healthier cooking until you’re less busy (AKA when your kids are leaving the house), but involving them and modeling this lifestyle is an invaluable gift they will take with them and use as adults. You can change your family’s food culture with your kids alongside.

    If you aren’t sure where to begin with teaching kids to cook, or you want them to take a self-guided course, I can recommend the Kids Cook Real Food course (affiliate link). Just the section on teaching kids how to safely handle sharp knives won me competent veggie choppers in a hurry! Specifically it taught them technique and catch phrases around how to handle knives that we are still using years later. I can tell my kids “up and over soldier” and they immediately switch their grip on the food they’re cutting.

    3. Get kid-free and get hustling!

    As an alternative strategy, some moms swear by having the kids occupied with their own pursuits right when the groceries arrive. Then mom (and dad?) can wash, chop, and prep right then when she & he can be most efficient.

    I also know other moms who save screen time for the pre-dinner hour so they can move faster to get things on the table.

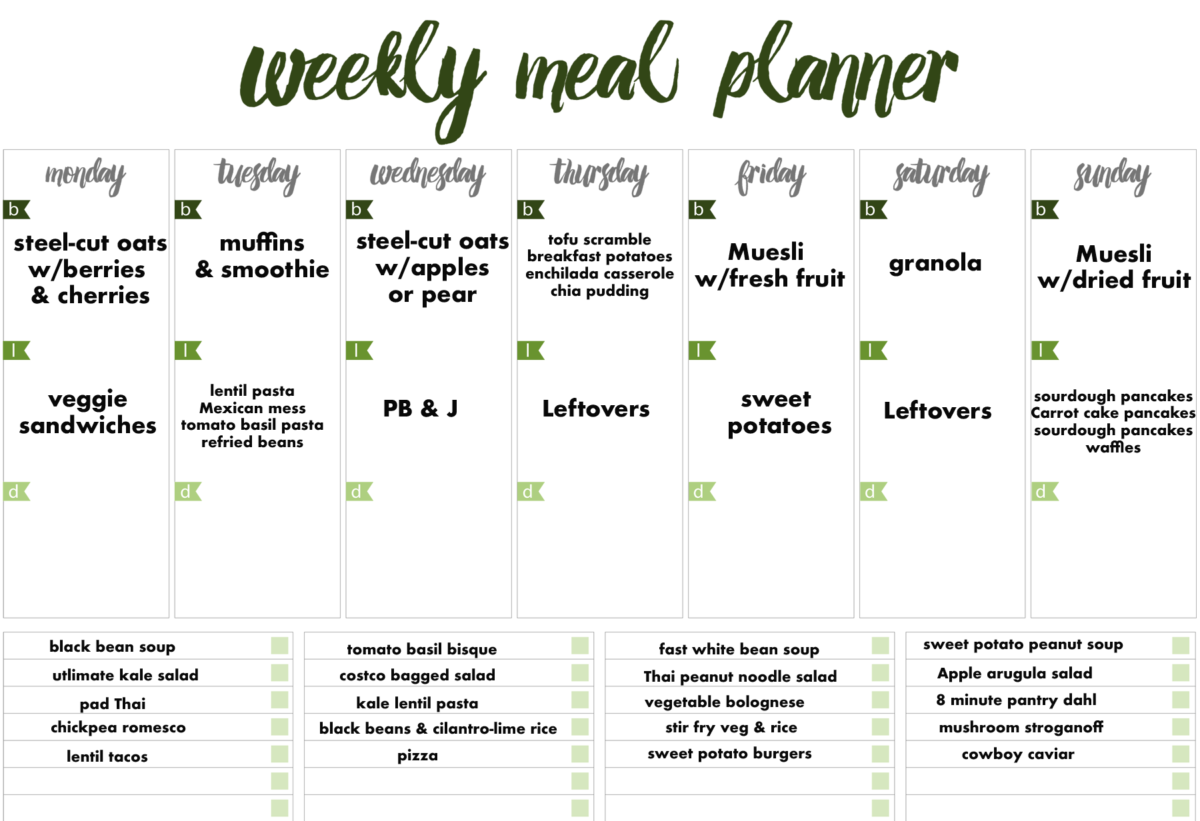
    4. Dramatically simplify your menu

    One mom says she sticks with fruit and whole grain granola and plant-based milk or toast with a nut butter for breakfast . That’s every breakfast at her house during this season in her family. It’s dramatically healthier than eggs or poptarts, it’s plant-based, and yes it “counts!” It may not be glamorous, but you can vary the fruit and having a standard breakfast would free you up to devote more brain cells to what you have for dinner.

    5. Embrace your time limitations

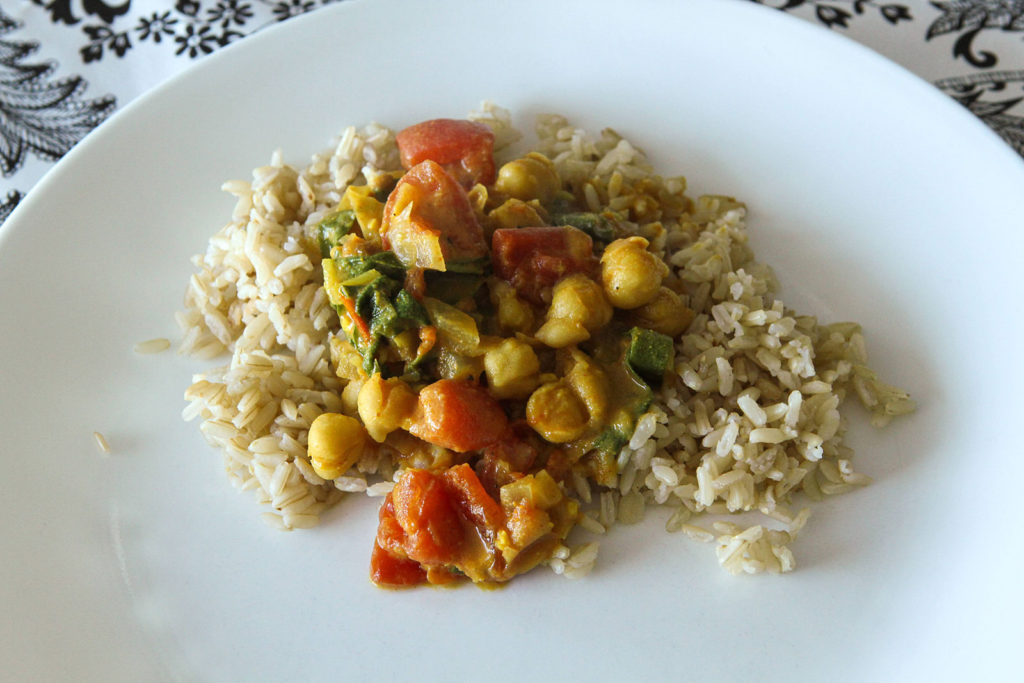
    For the other meals, the same simple-breakfast mom basically makes what she can in an hour a day, which for her means dinner falls under the category of vegetable broth-based soup, healthy pasta and vegetable dishes, veggie burgers with whole grain buns, lentil tacos, and chickpea dishes. That hour would include soaking beans for the next day, sticking some sweet potatoes in the oven for lunches later in the week, etc.

    Another mom says she only makes dinners she can prepare in less than 30 minutes. It’s doable if you keep gathering recipes that work for you.

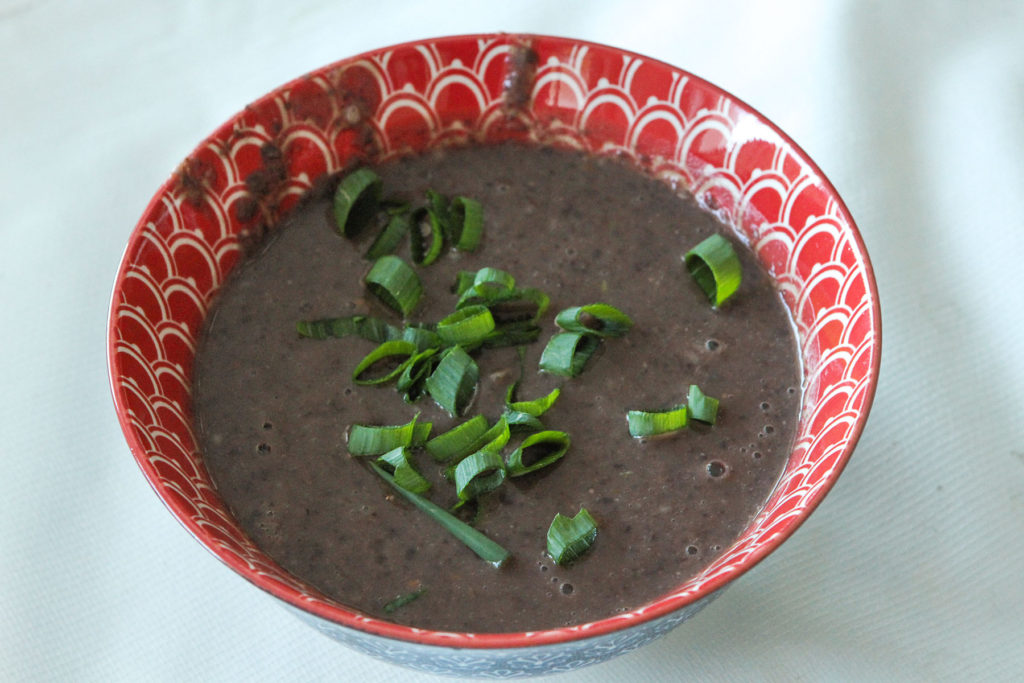
    My black bean soup takes 15 minutes and it’s a regular around here.
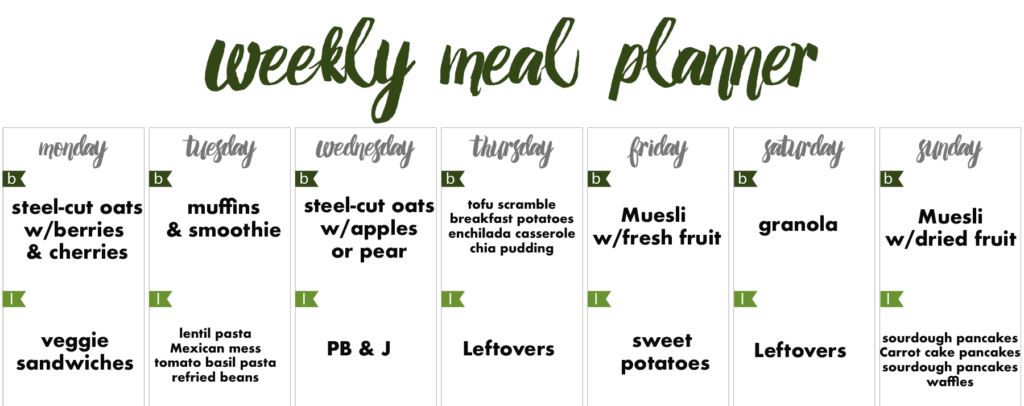
    6. Meal Plan

    If you don’t already do this, I would encourage you to try it for several months. It saves lots of stress and scramble, not to mention reducing trips to the store and increasing your efficiency when you can look ahead and prep for a future meal. (If you want help making a once-a-month menu plan, here it is.)

    7. Find like-minded inspiration online

    If you find yourself spending a lot of time looking for recipes and a lot of time making meals that don’t turn out, this tip may be one to try.

    It can be hard to gather fast recipes if you’re trying to start from scratch every time you search for meal ideas. If instead you can follow someone who tends to make simple recipes you like, it can be a gold-mine for quick meal ideas and very encouraging as you improve your family’s diet.

    Plantiful Kiki on YouTube is one like that for me! And when I discovered Shane and Simple, I quickly found a half dozen go-to recipes to add to our regular meals. Rather than jump around to different blogs and get hit-and-miss results, try sticking with one.

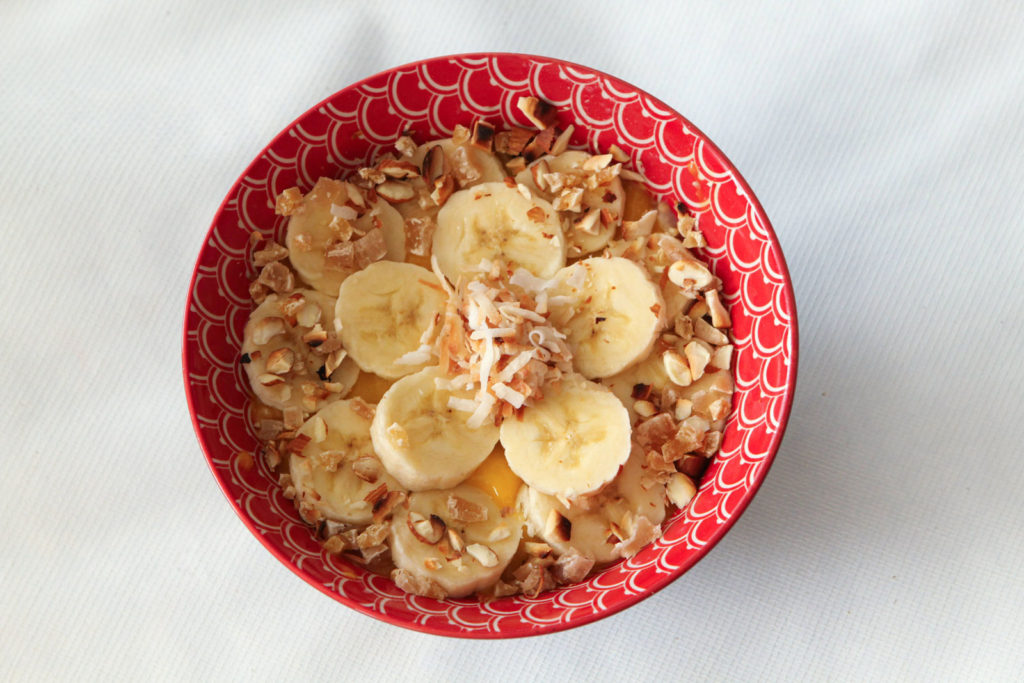
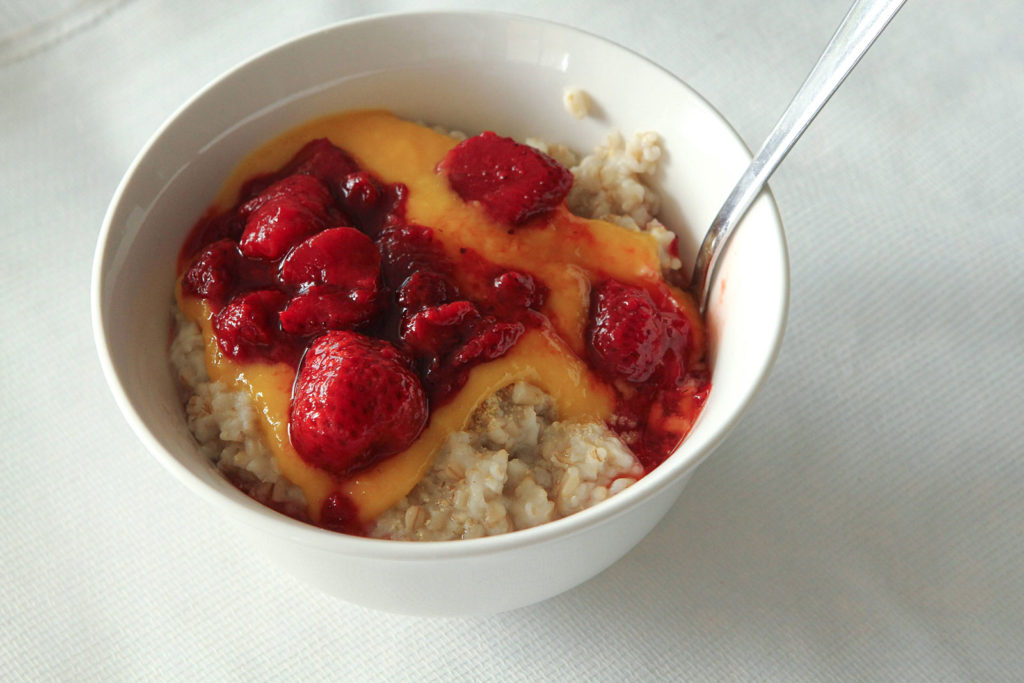
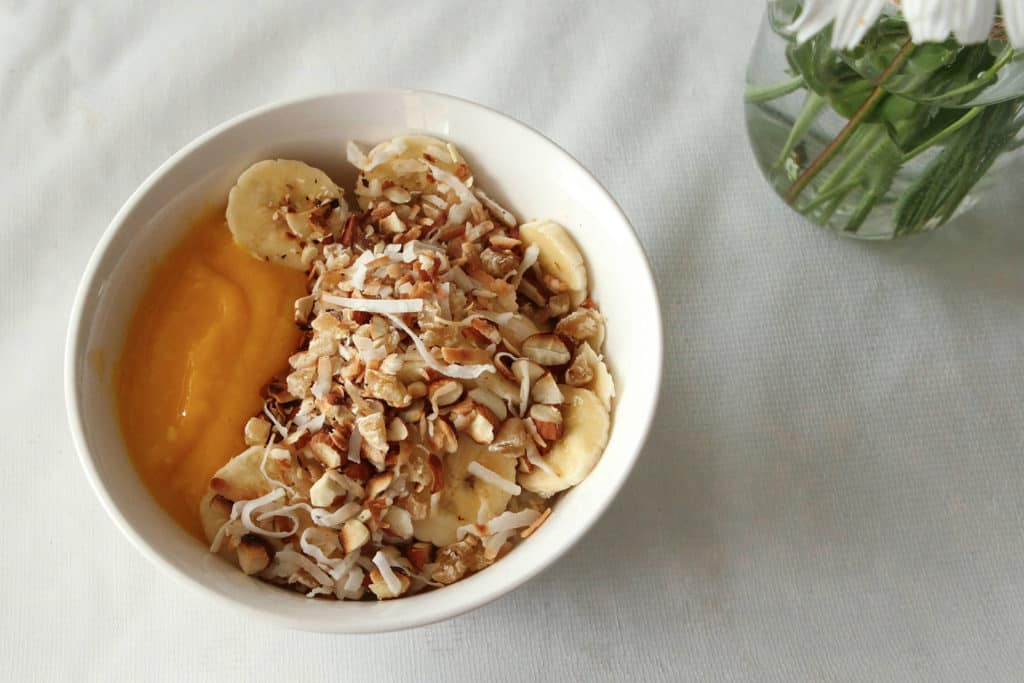
    8. Eat oatmeal for breakfast

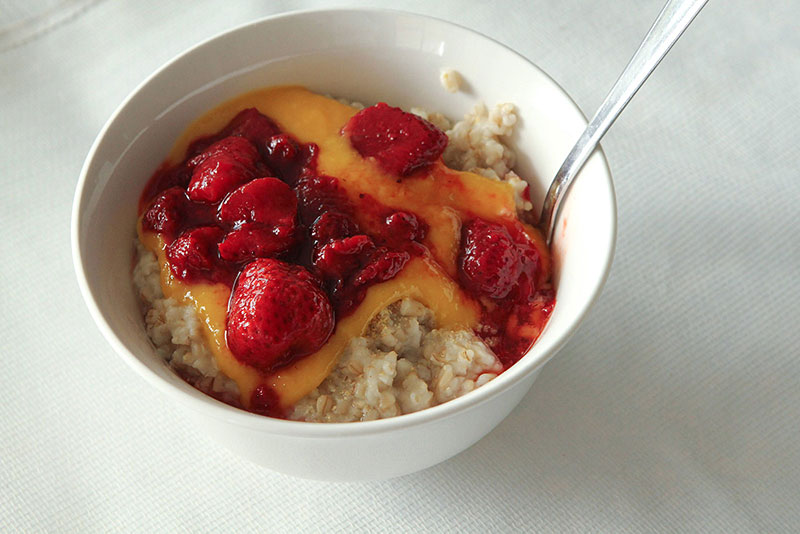
    It’s fast, filling, and easy to vary for seasons and taste preferences. Yum.

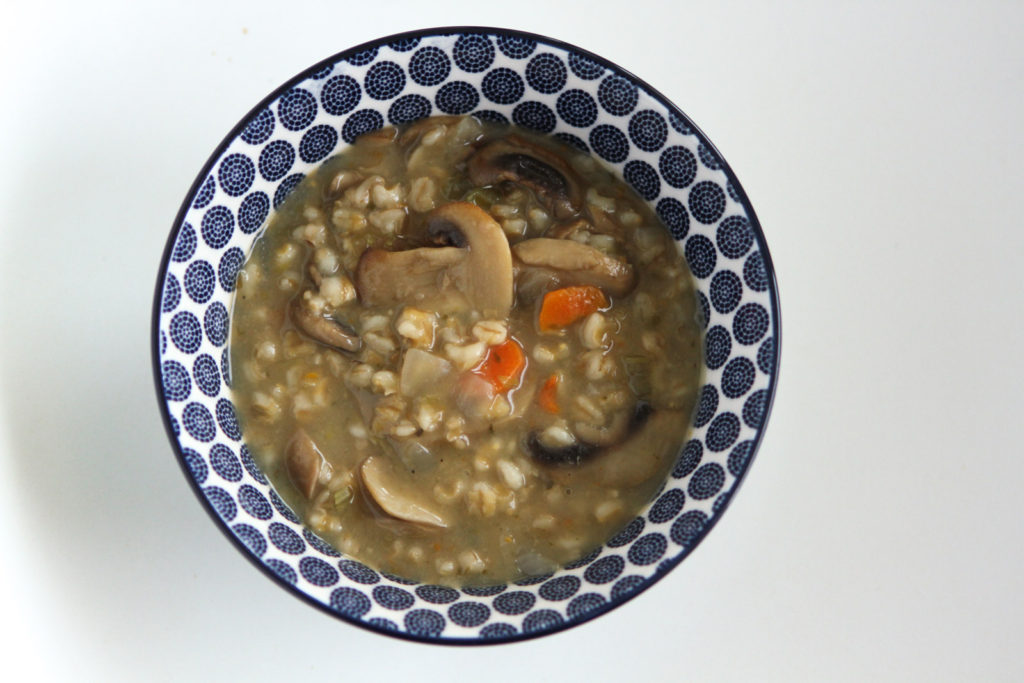
    9. Make a pot of soup for lunches

    Some moms make up a pot of soup on Sunday and serve it all week long, rounding it out with fruit and veggies for lunch.

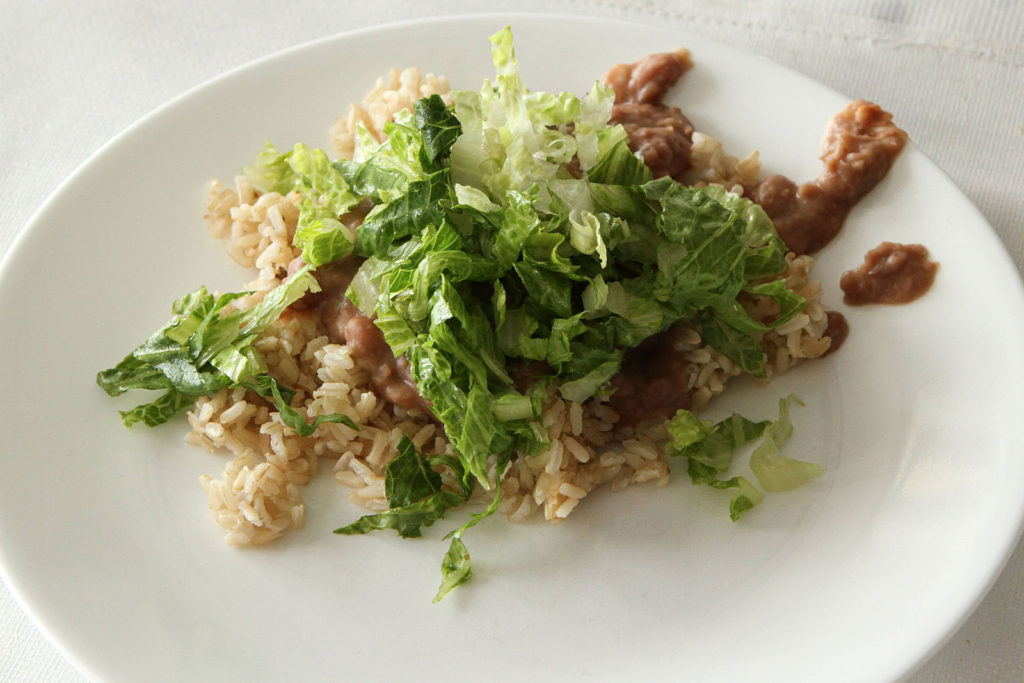
    10. Banish side dishes

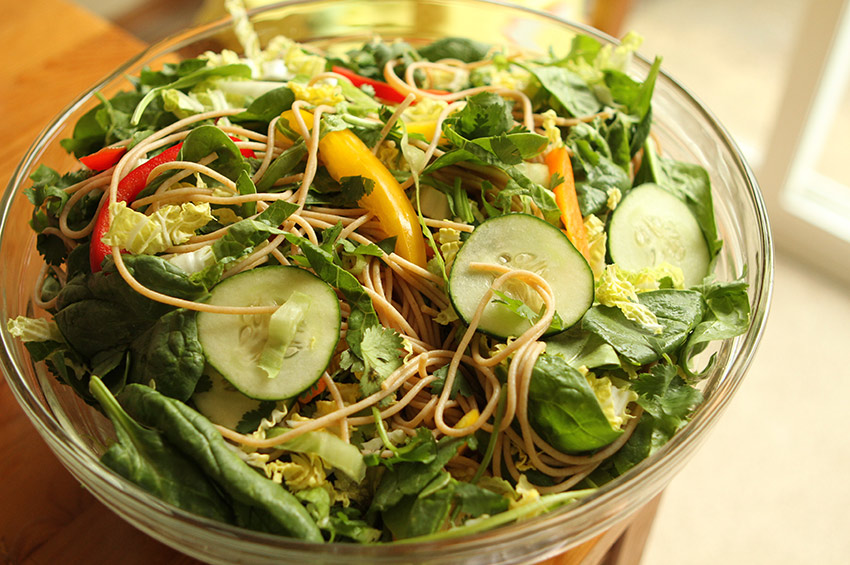
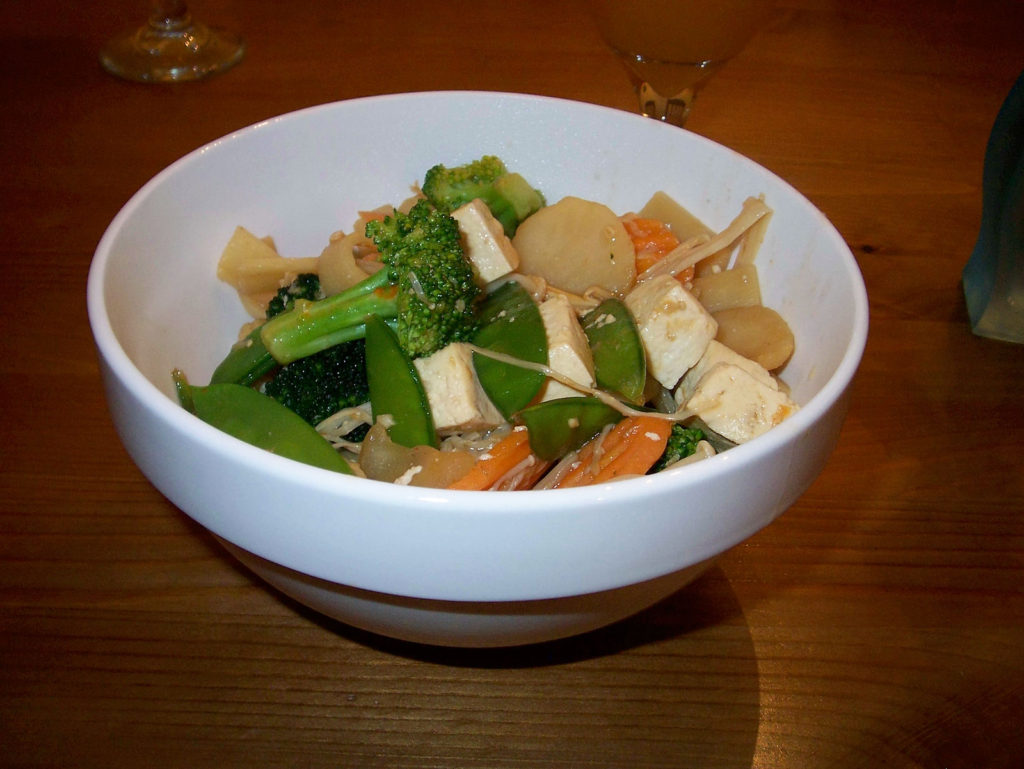
    Many of us grew up with a main dish of meat and at least one or two side dishes for dinner. But guess what? When vegetables ARE the main dish, you don’t need to prepare main course AND a side salad. It’s fine to do that, but it’s also fine to serve a one-dish wonder like I do most nights.

    11. Simplify with roasted vegetables

    If you do like a veggie side, several moms swore by simply tossing chopped fresh veggies (broccoli, asparagus, zucchini) or even frozen veggies (cauliflower, broccoli, brussels sprouts) straight on a parchment paper lined sheet pan with some olive oil and salt and pepper. They roast for 10-20 minutes at 400F and make a delicious dish with minimal effort.

    You’re aiming for a little bit crispy, but before they burn.

    (I need to try frozen because although that saves chopping time, I am wondering if they will crisp up? We loooove roasted fresh veggies though.)

    Bonus: Leftovers can be scrambled up with tofu or cooked with hashbrowns for breakfast the next day.

    12. Double (or triple) recipes whenever possible

    Leftovers are truly a free (from prep-time) lunch… or dinner. You save time with clean-up, planning, shopping, and prepping when you make the same dish stretch for several meals.

    If you have a family of leftover objectors, change up the leftovers a bit to make them more appealing. Wrap them in a tortilla or take the time crisp a veggie burger up in a pan instead of just nuking it in the micorwave.

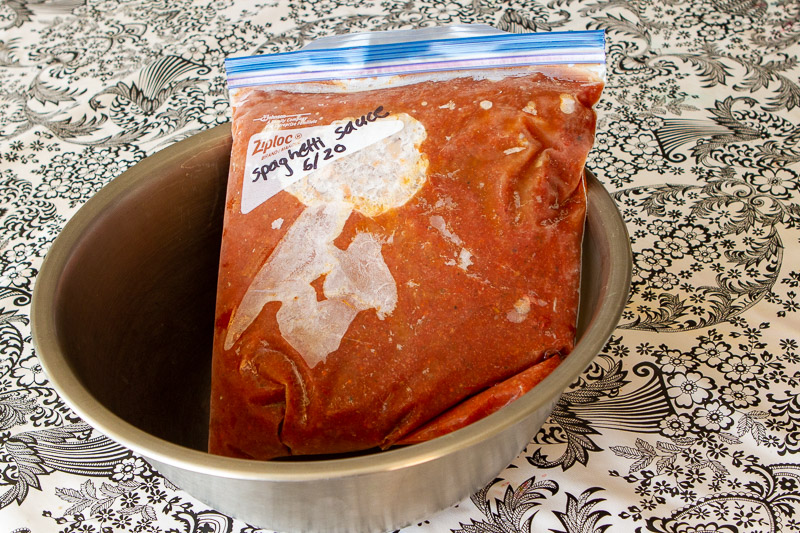
    13. Try it in the freezer

    We often depend on someone else to tell us if something freezes, but it’s pretty easy to just set aside a single portion, freeze it, and have it for lunch in a few weeks. Then you can mark your own recipe to indicate whether it freezes or not. You have hardly anything to lose, and lots to gain. Freezing meals helps inject variety into your future menus without complicating prep and shopping, and like leftovers, a freezer meal is a “free” lunch or dinner.

    My general rule of thumb is that we will happily eat frozen soup or anything we ladle over rice, as long as it doesn’t have potatoes or sweet potatoes. We aren’t a big fan of the texture of those after they’ve been frozen. (Think chili, lentil soup, chickpea curry, enchilada casserole, etc.) Also, I’ll sometimes leave out leafy greens from the part I freeze and add them when I re-heat the meal. Fresh cilantro, for example, will really brighten up a meal that’s been defrosted.

    I have nice big pans so I can triple a meal, and have it last for 2 dinners and a lunch, with a frozen dinner to pull out the following month.

    14. Batch cook for the freezer

    Some recipes can be frozen easily and don’t lose flavor or texture when thawed, even after many months. I will periodically make a BIG batch of something and freeze several extra bags of it for the following months.

    Example: When I make roasted tomato pesto in the summer time when fresh basil and tomatoes are easy to come by, we’ll eat it for dinner one night, but I’ll put 6-8 bags of the sauce in the freezer and we’ll eat it once a month in the fall and winter.

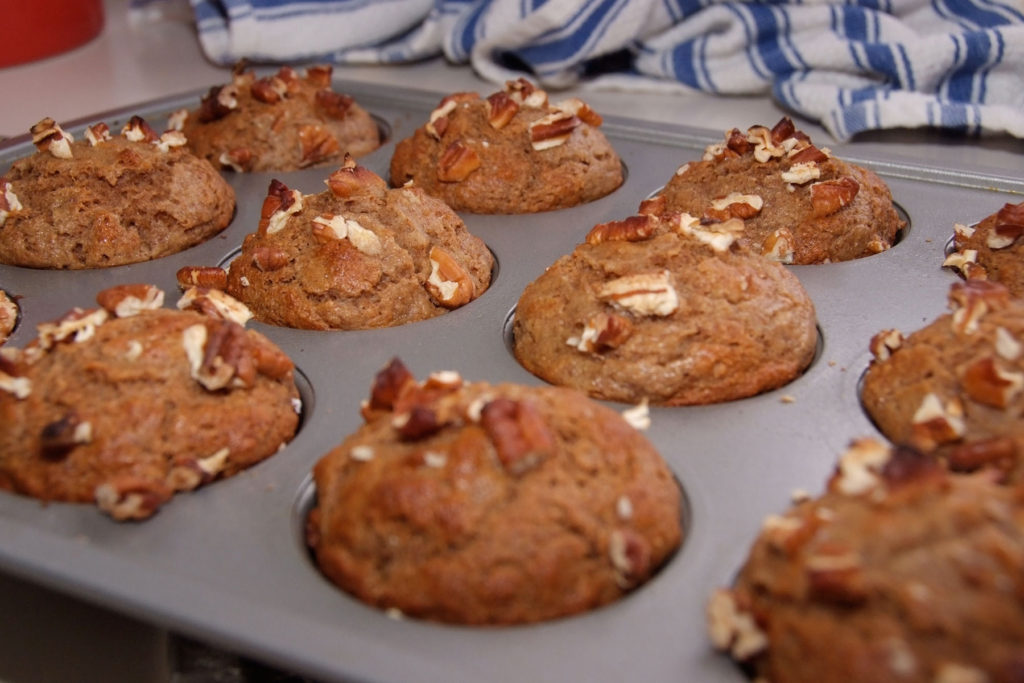
    We often eat muffins one morning a week for breakfast, but I only make muffins (and mess up the bowl and muffin tins) every 5-6 weeks and I fill freezer bags for subsequent weeks.

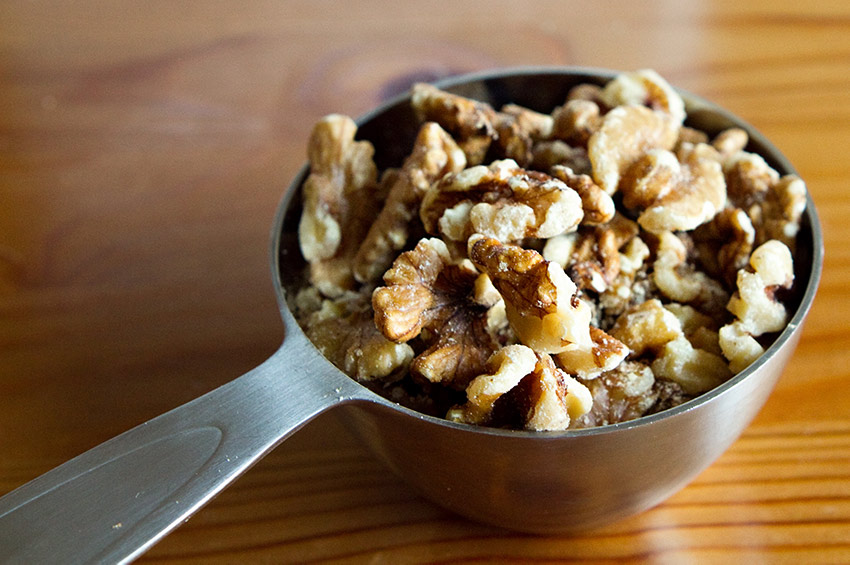
    15. Buy pre-cut fresh or frozen

    Frozen fruits and vegetables are picked at their peak and free of preservatives. They’re a great option for when you’re feeling tight for time, though sometimes you pay extra for the convenience.

    Butternut squash cubes, shredded carrots, chopped onion, fresh or frozen stir fry blends, shredded broccoli slaw, guacamole… there are lots of good options and all are time-savers!

    16. Get in the habit of prepping the whole thing

    If you’re slicing up some cucumber for lunch, slice the whole thing up for the next few days. Ditto a box of strawberries or an onion. Do a couple extra so you don’t have to pull out the cutting board every day.

    Think, “What else can I chop, as long as I’m chopping?” and picture yourself a karate master honing your mad chopping skills. Ha!

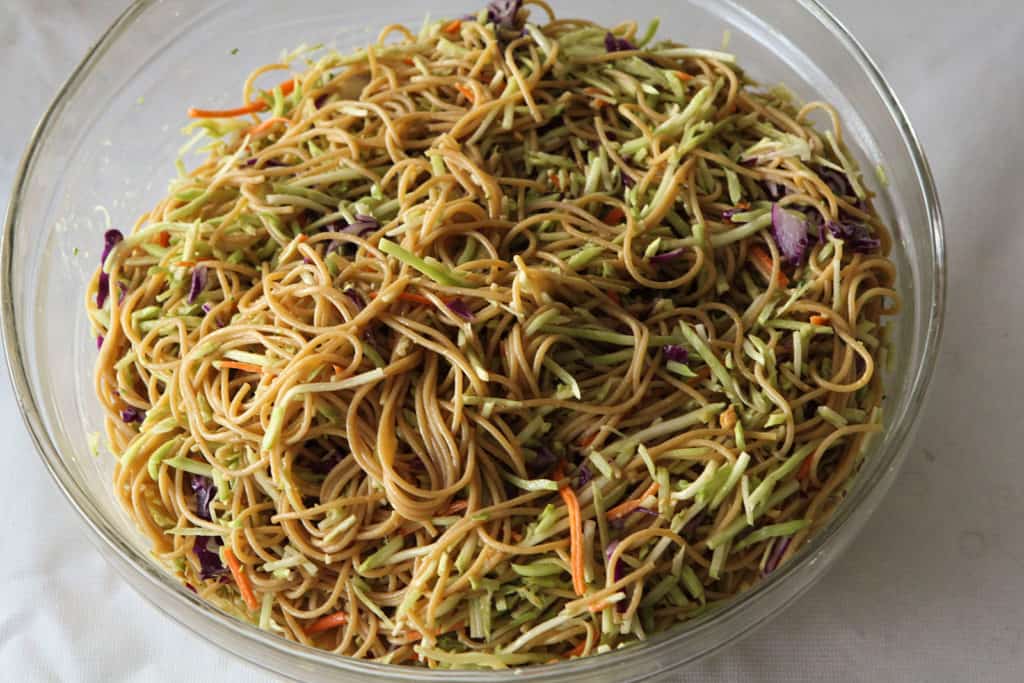
    17. Choose a menu that carries over ingredients

    I loved this example from Rainbow Plant Life on YouTube:

    She re-uses ingredients in multiple meals so weekend meal prep is under two hours, but there’s variety during the week. There’s no need to re-invent the wheel, and you can totally use some of her meal plans. But as you build your own list of meals your family likes, you can also just look for ones that group well together for easier prep because they have overlapping ingredients.

    18. Invest some time in learning

    Not a karate chopping master yet? Maybe your knife skills are weak, you haven’t ever figured out how to use that Instant Pot, or the food processor intimidates you. Sometimes the best way to speed up is to slow down and master some basic skills that will continually help you. I highly recommend watching some YouTube videos and practicing. I changed the way I chop sweet potatoes and it takes 1/3 of the time now! (I used to slice into rounds first, now I chop long sticks first.)

    19. Get a good chopping knife and a sharpener

    An excellent knife makes a tremendous difference in speed. You can find a good one for less than $30, which blows my mind, and my husband swears by this inexpensive knife sharpener.

    If you’re limping along with sub-par tools, recognize that cooking at home (efficiently enough so you aren’t ordering take-out as a last resort on the regular!) saves so much money.

    20. Use your food processor!

    Lots of people have one just gathering dust, and this appliance can speed up prep time considerably. This is especially true if you run several meals worth of veggies through there at a time.

    You’ll quickly get the hang of putting it together and taking it apart, and don’t be intimidated by the time it takes to wash up afterwards. If you do it promptly, and you’re not using oil, a quick rinse easily takes care of the mess.

    21. Choose chop-free snacks

    Rinsing blueberries takes seconds, bananas come with an easy to remove wrapper, snap peas are ready to go, baby carrots are fuss-free, etc.

    Frozen peas are a favorite here. (PSA: Use defrosted peas for toddlers and for heaven’s sake don’t let them walk around eating a choking hazard (like I sometimes do, apparently)! Always consume at the table.)

    22. Get a jump on dinner the night before

    If you can pull something out of the freezer, get some quick chopping done or ingredients measured out the night before, things will go much more smoothly the next day! You’ll have your plan in mind and the initial momentum already going. A few minutes of preparation can save you from the desperation drive-through.

    23. Fill kids up on intact starches

    They’ll be less munchy all day if they’ve had meals with plenty of brown rice, sweet potatoes, oatmeal, quinoa, etc. Sometimes people new to this way of eating don’t eat nearly enough at mealtime, so they feel the need to graze all day long. That leads to a messy kitchen and constant requests for snacks. Encourage everyone to eat plenty at a meal and then clean up and give yourself and your kitchen a break.

    24. Stay the course

    Many moms expressed how much more efficient and comfortable they got after they had been feeding their families this way for a while.

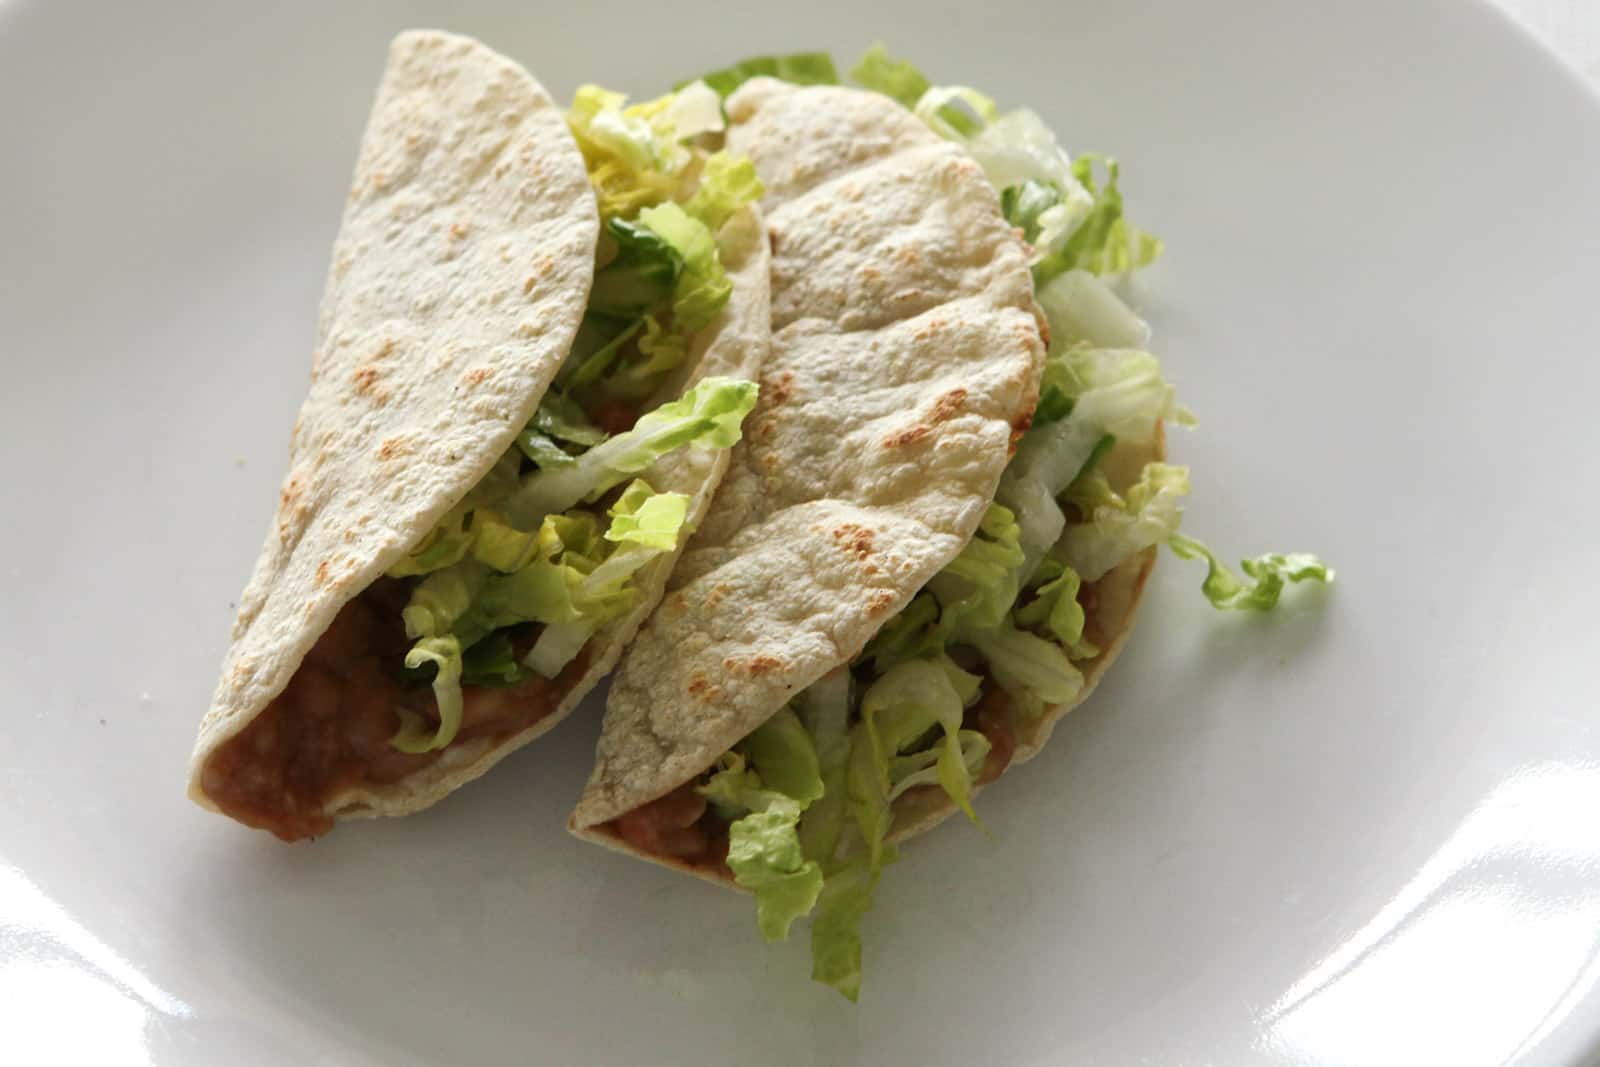
    25. Find your own balance

    Each of us will find the areas where we choose to compromise (store-bought tortillas, a regular dinner out, store-bought hummus, simpler recipes, etc.) to make this workable for our families.

    Don’t let perfectionism prevent you from making positive change!

    26. Funnel time to the kitchen

    There is a lot you can do to streamline your time in the kitchen, but you may need to spend less time in other areas in order to devote some time to cooking. Moms are constantly juggling different priorities.

    Personally, I have lower standards in some areas to allow me to make healthier food for my family. I don’t fold my little kids’ clothes (or washcloths or rags…) , I let my kids do chores around the house and call it “good enough,” I rarely (almost never) wash windows, etc.

    27. Make kitchen time count for double

    Time in the kitchen can be made much more pleasant and/or productive.

    Why not:

    • Listen to podcasts or an audiobook
    • Call a friend or a parent
    • Catch up on Youtube
    • Listen intently to any kid that stops by to chat
    • Enjoy one-on-one time with a kid who is your kitchen helper for the week
    • Just relax and listen to music you love.

    If the pre-dinner hour is chaotic in your house right now with a fussy baby or melting down older kids, I highly recommend making use of a more peaceful block of time to prep and cook. Nap time, night time, while your kids are happily eating lunch, on the weekend, or while your husband reads to them during dinner… any of these times are good candidates to take pressure off you to cook during The Witching Hour.

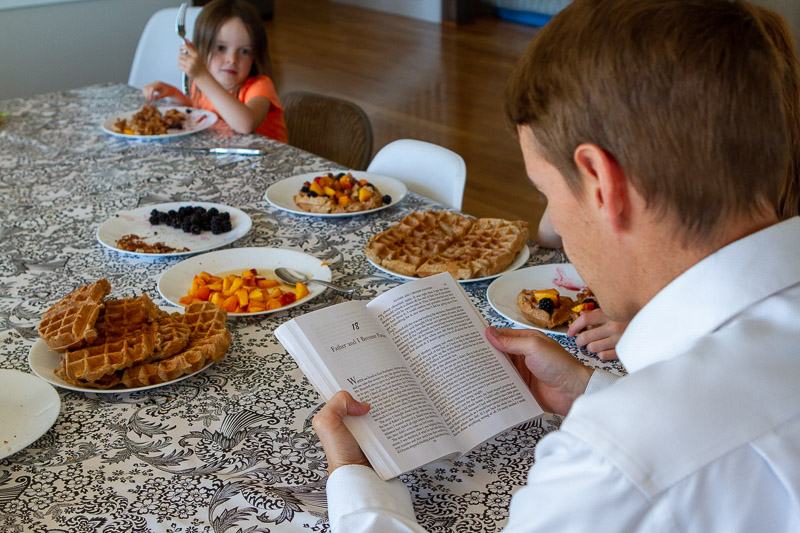
    Where is Mama when this picture was taken? Ok, I was behind the camera but before and after I was enjoying listening to my husband read while I put on some hustle in the kitchen, throwing things in the Instant Pot so dinner would be all taken care of.

    28. Don’t discount clean-up time!

    For a long while I was perplexed at how I could get dinner on the table fast, but I was still spending “forever” in the kitchen. Then I realized I as moving so fast that I made a major mess to deal with after dinner. This deserves a whole post, but for now just consider that all the wiping and washing is a factor as well, so, for example, using fewer pots and pans can help.

    29. Check your facts

    One of the most helpful things I’ve done to make my kitchen time more efficient is to simply use a kitchen timer (or the stopwatch on my phone) to time how long different tasks and dishes make.

    How long does it really take me to peel and chop a butternut squash? I only have to tap a button one time and I can find that out. That information can then inform whether I want to buy that vegetable pre-chopped or perhaps even avoid recipes that call for chopped squash in my menu plan, etc.

    Using a timer has also let me see which recipes actually can be cooked in the advertised time! I scribble right on my recipe how long it took ME from start to finish.

    30. Check your thinking

    Your attitude matters a whole lot, so if you find you’re complaining a lot (even to yourself) about time spent in the kitchen, you might try focusing on your gratitude for the mouths you have to feed and for the abundance of healthy food you have to work with.

    Just like some of the other mundane parts of mothering, doing it with love feels better.

    Help your fellow Mamas out!

    Please comment and share how you save time in your plant-based kitchen.

  • 4 Simple Ways to Lose More Weight on a Plant-Based Diet

    4 Simple Ways to Lose More Weight on a Plant-Based Diet

    While many people experience immediate and ongoing weight loss on a plant-based diet and love that they can eat a high volume of food and stay a healthy weight, there are others who plateau before reaching a healthy weight.

    Of course “eat fewer calories” is one approach, but counting calories and obsessing about portion sizes is not very sustainable. Plus, many people come to a plant-based diet wanting to be able to eat until they’re full and relax about portion size.

    Here are four things you might adjust if you find yourself eating plants but not losing weight. The good news is that once you reach a healthy weight, you can add back in some of those things you’ve been skipping.

    1. Don’t eat so many nuts.

    Nuts, along with avocados and seeds have the highest caloric density of any plants. It’s very easy to overdo it on nuts because they are delicious, easy to snack on, nice to spread on bread in their butter form, and they’re a common star of many rich and creamy plant-based dishes. All that adds up to a lot of calories!

    If you’re in the process of losing weight, limit yourself to just a handful or a quarter cup of nuts a day (and go easy of the avocado while you’re at it).

    2. Fill half your plate (or bowl) with non-starchy vegetables.

    On the other side of the caloric coin are the unsung heroes of the plant-based diet. Non-starchy vegetables are low in calories, high in bulk to fill your stomach, and they’re high in nutrition.

    Dr. McDougall recommends in his fantastic book, The Starch Solution (aff.), that if you are wanting to lose weight, you should fill every plate of food you eat half with non-starchy vegetables. Think broccoli, steamed chard, cucumbers, peppers, spinach, or snap peas, as opposed to beans, rice, pasta and potatoes.

    If you go back for seconds (and you should! Fill up at mealtimes!), make sure to fill each plate half full with those non-starchy vegetables. If you don’t like many yet, give yourself a chance. Remember that tastes change, and this is just while you’re actively trying to lose weight.

    3. Watch your (even whole grain) flour intake

    Even if you are eating a whole food, plant-based diet, it’s possible to overdo it on baked goods. Whereas whole grain pasta acquires a lot of water in cooking and tends to fill your stomach without so many calories, breads don’t have that effect. If weight is still an issue for you, try to build meals around intact grains like oats, rice, and quinoa, rather than processed grains like those found in pancakes and toast.

    Here’s a helpful (and highly entertaining) guide on navigating the bread aisle at your grocery store:

    4. Put a time-limit on your eating.

    Our late-night snacking is rarely the healthiest, and restricting your eating window is an effective way to reduce your overall caloric intake without going hungry since your body will adjust to it fairly quickly if you’re consistent. Time-restricted eating appears to have benefits outside of weight loss as well. Even just cleaning your kitchen (and your teeth!) at 7pm and eating breakfast at 8am gives your body enough time to reap the benefits.

    Further Resources

    • Along with The Starch Solution mentioned previously, the book How Not to Diet has solid science-driven help for weight loss on a plant-based diet.
    • Dr. Greger, the author of How Not to Diet, has a free app called The Daily Dozen that makes it easy to track and daily check-off the recommendations he makes for optimal health and healthy weight.
    • Don’t jump to a different “diet” for a quick fix. Stay the course. Here’s an excellent video addressing how keto and plant-based diets compare for weight loss and overall health:
    • Finally, I can recommend Plantiful Kiki’s content on YouTube. She has chronicled her weight loss following The Starch Solution, and I’m inspired by her simple but lovely everyday meals.
  • 5+ Plant-Based Meals You Can Make Without a Recipe

    5+ Plant-Based Meals You Can Make Without a Recipe

    Many people new to plant-based eating get overwhelmed with finding and then following a bevy of new recipes, which often have a daunting list of unfamiliar ingredients. Even those who have been eating this way for a while can find themselves constantly on the hunt for new recipes that will be somehow faster, easier, or cheaper than what they made last week.

    The good news is that there are many things you can make without any recipe at all, and you can come back to these things again and again to simplify your food and your life. That will free up time and brain space so if you do want to go ahead and try some fancier meals, your time and budget will better allow it.

    1. Beans and Rice

    This is a standby of thousands of vegans for a reason. When in doubt, just cook up a pot of beans and a pot of rice.

    Here are four ways to simplify this:

    • Use canned beans. Just rinse them first! Kidney beans, black beans, or black-eyed peas are all good choices here.

    • Use salsa and/or taco seasoning to flavor it. Stir in the salsa afterwards, or add the taco seasoning to your rice cooking water.

    • Use a rice cooker (or an instant pot) to take the guesswork out of cooking.

    • Make lots and freeze it. It freezes beautifully. Tip: If you ever end up with too-dry leftover rice, throw a couple of ice cubes on it and stick it in the microwave. It’ll be tender again in a hurry.

    Here are 10 ways to jazz this up:

    • Chop up some romaine lettuce to put on top, or heap your beans and rice on a bed of spinach or arugula.

    • Add some chopped cilantro or sliced green onions.

    • Throw a can of diced tomatoes with chiles (Rotel) in with your beans.

    • Throw some frozen corn in with your beans.

    • Make the beans yourself. You can do it in an instant pot or in a slow-cooker. You can soak them or not. But making them homemade allows you to season them while they cook, which is a plus. Again, just a taco seasoning blend will work, but you could also chop some onion, garlic, and bell pepper to put in there, or dried onion and garlic. Beans are VERY forgiving as long as you stick to these type of seasonings. (Cumin, chili powder and paprika also work here.)

    • Try blending up those home-cooked beans with some of the cooking water so they are a “refried” consistency.

    • You can also use a can of fat-free refried beans. I like to stir in some salsa and warm it up in the microwave before using.

    • Toast up some corn tortillas in a dry skillet and make oil-free tostadas.

    • Wrap your beans and rice in a whole grain tortilla.

    • Add avocado or chopped fresh cherry tomatoes.

    • Use a different grain for variety. Quinoa is also a good choice here.

    By all means, look up cooking times online and even consult a beans and rice recipe if you want to make sure your seasonings are in the right ball park. But then let yourself wing it and just enjoy the result.

    This counts. This was many a meal for me in college, even before I ate a plant-based diet.
    Homemade refried beans take 5 minutes to pull together in an Instant Pot and topped with romaine they are a solid option.
    easy vegan tacos
    Toasty corn tortillas give this bean and rice meal a different feel.
    My 12 yo daughter used canned refried beans and dressed them up with things we had on hand: some red onion, frozen roasted corn, bell pepper, cherry tomatoes and romaine. She piled it all on a toasted up corn tortilla.

    1b. Sweet Potato and Black Beans

    Instead of serving those beans over rice, try topping a roasted or steamed sweet potato with beans. Add salsa, avocado, a squeeze of lime, and/or any of the suggestions above. Yum.

    Alternatively, you can cube up a sweet potato into bite-sized pieces, sprinkle on taco seasoning and roast it. Add it to any of the bean and rice options.

    2. Pasta and Red Sauce

    I think this is a standby of many meat-eaters as well, but they often brown up some ground beef to go in it. Totally unnecessary!

    Just grab a jar of meat-free marinara sauce and a box of whole-grain pasta, and you’ll be in business.

    I can’t make it easier than that, but I can make it more interesting:

    • Cook some lentils up (1 c. per pound of pasta is a fine place to start) while you’re cooking your noodles. They’ll take 20-25 minutes to get tender. Then just drain them and add them to your sauce and pasta. They bulk up the meal and add texture.

    • Alternative: My kids like rinsed cans of kidney beans added to their sauce.

    • I know lots of people add frozen vegetables (especially chopped spinach) to their sauce. We haven’t done this, but I think it could be great as long as you thaw and drain those veggies first. No one likes a soggy sauce.

    • Make your own sauce! Plenty of sauteed garlic + crushed tomatoes + dried oregano + time simmering = spaghetti sauce. Of course you can find recipes online, but you can also just keep it simple and still enjoy a yummy bowl of pasta.

    • If I have mushrooms, zucchini, or green bell pepper I’ll sauté those up and add them to the sauce as well. No measuring or fussing needed.

    pasta for picky eaters with the sauce only in the middle
    Jarred sauce plus cooked lentils and some extra salt and pepper. Fast and filling!

    3. Green Smoothies

    Ok, so maybe this is a recipe. But I don’t ever have to look it up! I just pack my Vitamix with handfuls of leafy greens (spinach or “power greens blend” from Costco, usually) until it’s 1/2 full (for a mild smoothie) or 3/4 full (for a stout smoothie). I add a handful of flaxseed, fill it with water up to the line of the greens and blend it well. In goes a banana or two and whatever frozen fruit I have (mango, strawberries…) . Blend and done!

    Yes there are lots of delicious smoothie recipes out there, but this one always works with what I have on hand and it’s so easy to follow that I can have it often.

    4. Vegetable Soup

    It turns out, you can make a delicious vegetable soup with just the following:

    1. A good vegetable broth

    2. Quinoa, couscous or barley

    3. A type of bean (already cooked) or lentil (will cook in the soup)

    4. Diced up vegetables

    I often like to add leafy greens once the other vegetables are tender, then serve the soup when the greens begin to wilt.

    Jazz it up:

    • Start with minced onion, carrot and celery. That makes a delicious beginning.

    • Use a bay leaf (remove after cooking) and some thyme, or simply use an Italian seasoning blend.

    As before, you can start with an official vegetable soup recipe but once you’ve made a few, shake off the shackles and feel free to use up whatever veggies YOU have on hand, and make it suit your tastes.

    Vegetable soup doesn’t have to be complicated!

    5. Asian Vegetables

    This can be as simple as combining broccoli, which you chop and cook up (roast, steam or saute), with some soy sauce and serving over rice.

    • Jazz it up with roasted seaweed, avocado, or sliced green onions.

    • Use a fresh or frozen stir fry blend of vegetables or make your own by adding carrots, green beans, and whatever else suits your fancy.

    • Start your veggies cooking with garlic and ginger in the pan. Mmmm.

    • Add a can of drained pineapple for a fun twist.

    • Cubed tofu fits easily here.

    • Use rice noodles instead of rice for a change of pace.

    • Soy sauce alone not cutting it? Add Sriracha for some kick, or try: 1 TBS each of soy sauce, brown sugar, rice vinegar, and peanut butter. Yeah it’s sort of a recipe but you won’t have to look it up once you’d done it a time or two.

    There are loads of fabulous plant-based recipes out there, and sometimes that leads us to overcomplicate eating this way! There’s nothing wrong with having simple tastes and simply making something from what you have on hand.

    What are your favorite no-recipe ways to eat plants?

  • 6 Fixes for Your Failed Meal Plan

    Having a plant-based meal plan, even just for dinners, can help tremendously with your family’s health and grocery budget… but only if you actually follow it! Otherwise you’re left with wilty produce, take-out (again), and possibly a side dish of feeling defeated.

    Thanks to the wisdom of many moms who have come before me and slayed the dinner dragon, I have successfully identified and implemented these lynchpin habits that help me feed my family better.

    Without further ado:

    1. Match your Meal Plan to Your Reality

    I find that meal planning when I’m already a little wiped out at the end of the day is better than making a plan when I’m feeling all optimistic and energetic.

    Seriously.

    It’s just a little too easy to jot down a complicated, delicious-sounding NEW recipe and pencil it in for 6 days from now. “Surely on that day I’ll have a free hour before dinner with no phone ringing or baby crying.” It doesn’t work like that at my house! The pre-dinner hour is sometimes cah-razy. And if I keep that in mind when I’m planning my meals, the plan is much more realistic.

    I look at my week ahead and make sure I’ve got leftover nights, crockpot nights or pull-something-from-the-freezer nights. All of those are fine options for dinner when I plan on them. If instead I plan for something from scratch every night, I’ll probably be serving up peanut butter sandwiches while my kale droops in the back of the fridge.

    Another key principle here for me is to not put too many new recipes on the menu for a week. I like to mix things up, but the reality is that anytime I make something new, it takes longer because I’m unfamiliar with it.

    Busy night green light. Simple, tasty, healthy. Nothing to write home about:

    Danger, Will Robinson. This plan might get abandoned on a crazy weeknight:

    2. Pick one thing to prep for the week

    Sometimes we get stuck in the mindset that we are either have to be a prep-everything-on-the-weekend hero, or we just show up at the dinner hour and hope for the best. Not so!

    Pick just one category and try putting in the 10-30 minutes it needs on the weekend. Maybe that’s measuring out all your spices and mixing up sauces for the week. Maybe that’s chopping up all the vegetables for dinners. Maybe it’s measuring out all your dry ingredients for muffins/pancakes/cornbread you have on the menu. Or cooking up a batch of brown rice and a dozen sweet potatoes.

    Who knows? You might get hooked on it and become one of those weekend meal prep heroes. But even if you just make the rest of the week a bit smoother, you’ll be glad!

    It’s much more efficient to pull out and put away spices once per week.

    3. Make The Dinner Decision by kitchen cleanup the night before

    I plan my week (actually month!) of dinners ahead of time, so I know I have ingredients on hand for a certain list of meals. However, life happens and plans shift and change. We have more or fewer leftovers than I anticipated, meals get shuffled around, maybe I didn’t get to the grocery store when I planned… and I start to get a vague sense of unease when I think about dinner.

    What will I make for dinner? Hmmm… let’s see…

    I postpone the decision. The unease grows. Suddenly it’s coming up on 6 o’clock and I’m desperately checking my meal plan to see if any meals miraculously take 10 minutes to pull together with zero prep work. (Spoiler: Not many.)

    A wise mom told me years ago to decide the night before. Just call it. Maybe it IS off-plan and you’re going to serve cereal for dinner, or maybe you really do need to pay the piper and make that tricky dish you’ve been regretting buying ingredients for. But whatever the reality is, face it by dinner the night before. That brings so much more peace all the next day, along with these bonuses:

    • You have time to pull something out of the freezer, if you need to, and have it defrost gracefully rather than trying to rush it. (Been there.)

    • You have time to soak beans.

    • If you decide before the dinner mess is cleaned up, you can use that cutting board to chop up some more veggies and get a jump on the next night without extra mess.

    • You’ll know what time to start going on dinner the next day.

    I can cook up noodles the night before while I’m already using the stove, rinse them and keep them in the fridge, turning this Asian noodle salad into a true 10 minute dinner the following night.

    4. Check in with dinner at breakfast

    While you’re already in the kitchen, think about dinner. Does something need to go in the crockpot or Instant pot? Do you have a few minutes while the microwave is running or the kids are finishing their bowls of oatmeal that you can use to measure out spices or pull out the boxes of pasta?

    Getting started is a mental hurdle sometimes, and if you put 5 or 10 minutes towards it early in the day, it is so much easier to just “finish things up” later.

    Homemade refried beans take 5 minutes to start at breakfast, 5 minutes to finish up for dinner.

    5. Have a few “pantry meals” and “round-up meals” in your pocket

    Planning is really only guessing. It’s fairly common around here to end up needing to come up with an extra dinner before we make it to the grocery store, or having some odds and ends of produce leftover after making all the planned meals.

    “Pantry meals” or “shelf meals” are ones that you can make using only things you almost always have on hand. No fresh produce required, though I can almost always count on having carrots, celery, and onions because those keep so well. I have a half dozen pantry meal recipes I can pull together to stretch my meal plan until we can grab some more produce.

    “Round-up meals” are ones that happily accommodate your extra produce so you can avoid food waste and clear the decks for a new meal plan. Think vegetable soup, stir fry, or curry.

    This curry is great with broccoli, kale, mushrooms, cauliflower, zucchini, green bell peppers… almost anything!

    Knowing you can use up that produce or come up with a healthy dinner when your fridge is mostly empty gives peace of mind and saves you from wasted food or extra trips to the store.

    Meal plan prizes

    There are no gold stars and rarely high fives for executing your meal plan well, but you will get more time to spend enjoying your people and an added measure of peace about how you’re going to fill their bellies with healthy food. Those are pretty solid rewards.

    This magical time reading by the river was brought to you by my meal plan. Dinner was done and waiting for us after the sun set.
  • Why You Should Serve Oatmeal for Breakfast if at All Possible

    Why You Should Serve Oatmeal for Breakfast if at All Possible

    I’m serious about this. Oatmeal is such a beautiful intersection of cheap, easy, healthy and delicious. If you’re shooting for a whole food plant-based diet, or just improved health, start with oatmeal for breakfast most mornings.

    If you think oats are gloopy or boring, please keep reading. I’ll solve both of those problems for you.

    If your kids don’t like oats? Trade them in for kids that do. Or, just keep trying with the kids you’ve got. They’ll come around eventually.

    You’re going to save so much money over any kind of prepared breakfast food (bars, boxes of cereal, etc.), you’ll ditch the added sugar, and oats will keep you all full longer. There are even great hot weather options!

    Getting the Oats Cooked Right

    The first thing you need to know is that an intact oat is called an oat groat. Ok, you didn’t need to know that, but it’s helpful. An oat groat looks like a grain of wheat.

    Steel-cut oats are simply oat groats that have been sliced up into a few pieces. Rolled oats, however, are oat groats that have been steamed and then rolled. Instant or quick oats are hardly worth mentioning here, but they’ve basically been pre-cooked, then dried, then rolled, and are processed beyond recognition. If you are judging oat potential by the little packets at hotel breakfasts, you are missing out.

    Note: Some toppings you’ll want to cook in the oats, and you’ll add those when you add the oats. Some you add after. Be sure to scroll down for all the topping tips.

    Option 1: Rolled Oats

    Rolled oats are quick and easy to make in the microwave in a single portion, and they don’t dirty extra dishes… but my husband finds the texture off-putting. I make these for my kids often, and it’s easy to make my husband a bowl of matching muesli (see Option 3) at the same time.

    Here’s the rolled oats microwave version:

    • 1 cup of rolled oats
    • 1 1/2 cups of water

    Microwave for 1.5-2.5 minutes (just keep an eye on it so it does not boil over. Once you know the right time for YOUR microwave, you won’t have to watch it.). You can also cook it at 3/4 power to prevent an eruption.

    You may find that you prefer 1 3/4 c. water, instead. It will thicken as it cools!

    You can also make rolled oats on the stovetop:

    • 2 cups of rolled oats
    • 4 cups of water

    Bring the water to a boil, add the oats and lower the temperature. Stir and simmer for about 5 minutes.

    One cup uncooked oats is a standard portion size around here. That is the caloric equivalent of 3 of those lame little instant oat packets, but far less mushy.

    Option 2: Steel-cut Oats

    First, I need to advise you not to buy the steel-cut oats in the little metal cans at the store. They are heinously overpriced. If you plan to eat steel-cut oats on a regular basis, you need to find a reasonably-priced source. I pay less than a dollar a pound.

    The texture is far superior to rolled oats, and the flavor is nuttier and tasty. They’re a win all around, except they seem more intimidating to prepare, until you know the secret!

    The easiest way to cook steel-cut oats, the night before:

    The night before, simply boil your oats on the stove for one minute. Give them a stir, turn off the heat, put the lid on. That’s it! In the morning your oats will be ready to warm up and eat.

    Ratio:

    • 3.5 cups of water
    • 1 cup of steel-cut oats

    For one meal, I’m making about .5 cups of steel-cut oats per person.

    The easiest way to cook steel-cut oats, the morning of:

    I don’t like standing at the stove stirring things. Usually my kids keep me hopping while I’m pulling breakfast together, so having to babysit something on the stove leads to spillover, burnage, or both.

    Here’s the hands-off way to perfect steel-cut oats in the morning:

    1. Boil the water.
    2. Add the oats and turn down the heat until they’re barely simmering.
    3. Simmer unsupervised for 10 minutes.
    4. Turn off the stove, stir once, and put a lid on them. Come back in 20 minutes.
    5. Stir and enjoy!

    Again, here your ratio is:

    • 3.5 cups of water
    • 1 cup of steel-cut oats

    For one meal, I’m making about .5 cups of steel-cut oats per person.

    Option 3: Muesli

    In Switzerland and Germany this is very common for breakfast, but for some reason few Americans have figured out this excellent oatmeal alternative.

    Basically, at our house muesli is rolled oats (or a rolled multigrain blend), plus dried or fresh fruit, plus plant-milk or juice.

    That’s it! You can (optionally) soak your fruit in the liquid overnight and then add the grains in the morning, but we usually just throw this together the morning of.

    Option 4: Overnight Oats

    This is basically muesli, but made ahead so everything is ready to go when you wake up in the morning. You can eat it cold or warm, and I’ll bet you’ve seen it made in cute individual mason jars on many blogs.

    I made it once in cute little mason jars and then realized that cleaning out a half dozen individual mason jars was not worth the cute factor for me! You do you, though, and you could probably make up a batch and then scoop it into bowls the morning of pretty easily. Googling “Overnight Oats” will give lots of topping ideas, and I thought it worth including as an option.

    Did I say cheap?

    Saving money on your grocery budget is a high priority for many people, right up there with enjoying better health.

    We buy both rolled oats and steel-cut oats from our local Winco Foods for $.75/lb. We can make 5 BIG, belly-filling servings of oats from one pound of dry oats. That’s 15 cents a serving, leaving plenty of wiggle room for spices and fresh fruit to put on top.

    If you don’t have a good source locally, look online. If you were to order a 25 lb bag of steel-cut oats from Bob’s Red Mill online, you would be getting 125 servings of breakfast for $28!

    Always different, always delicious

    Just because you have oatmeal most mornings of the week does not mean it needs to be boring. In the colder months, we have cooked oatmeal 3x/week and muesli 2x/week, and we tend to flip that ratio around to favor muesli when the weather is warmer. It’s easy to change up the toppings so breakfast is yummy all year.

    Here are 11 favorites to get you started:

    1. Every Monday, we have steel-cut oats with (usually frozen) berries or cherries. I like to streamline our menu plan and it’s nice to not make a decision for Monday mornings.

      Pro tip: I scoop a cup of berries or cherries in each bowl when I put the pan of water on to boil. By the time the oats are done the berries are partially thawed, so stirring a cup of piping oatmeal into each bowl makes it a perfect temperature for digging right in.

    2. Once a week, we add apples, raisins, cinnamon, vanilla, and walnuts to either oats or muesli.

      Pro Tip: I like to cook the raisins with the oats so they’re soft, but add the apples in afterwards. Try it both ways!

      I also sometimes have this combination in a muesli made with apple cider instead of plant-based milk. Mmmm.

    3. Most of us (my husband excepted) love banana, cinnamon, nutmeg, and walnuts in our oats. I mash up the banana with a fork and stir it in after the oats are cooked.

    4. In the summer, peaches, cardamom and pecan with fresh blackberries is as close to heaven in a bowl as I can imagine.

    5. Pear and crystallized ginger, again with the sliced almonds.

    6. Date crumbles, unsweetened coconut, sunflower seeds, and cinnamon

    7. Fresh fruit muesli with grapes, apples, oranges, and (optionally) bananas

    8. Chopped dried apricot with pumpkin seeds (AKA pepitas)

    9. Applesauce and cinnamon. One time I invented “applesauce muesli” out of desperation and it’s become a steady favorite. I just stir unsweetened applesauce into rolled oats, add some cinnamon and flax and voila. Happy kids.

    10. Blueberries, lemon zest and sliced almonds

    11. Pumpkin, sweet potato, or winter squash – If I have some in my fridge already cooked, I’ll add it along with cinnamon and some date crumbles.

    Oatmeal. Make it your next breakfast!

    And, if you have kids and they’re starving and the oatmeal is still too hot to eat, serve it spread out on a plate.

    It’s less attractive but still every bit as yummy, cheap, easy and healthy.

    Just keepin’ it real.

  • Once-a-Month Plant-Based Menu Planning

    Once-a-Month Plant-Based Menu Planning

    Winging it for dinner is just not sustainable for me. Some meal planning is essential because I have five children (ages 1-12) and a hungry husband, and I don’t like the “What am I going to make for dinner?” question hanging over my head all day. We try to eat 90% whole plant foods, which means just picking up fast food or ordering a pizza isn’t a good backup “plan.”

    For years I struggled to find something that stuck. Mostly, I’d put off meal-planning because it was an unpleasant chore and the plans I make didn’t seem to be flexible enough to hold up to real life. I’d end up winging it anyway because in the pre-dinner hour I couldn’t pull together a new or complicated recipe in time. Produce would go bad waiting to be made into meals, and I’d start avoiding meal planning again.

    I couldn’t use a pre-made plan online, as great as they sounded, because they didn’t fit the preferences of my family or my timeline in the kitchen. It would mean too many new meals at once, too many new ingredients, and it felt overwhelming instead of helpful.

    Then I stumbled upon a once-a-month meal planning video from a mother of 9(!), and it was perfect. I adopted it to our plant-based lifestyle and haven’t looked back since. It’s easy to implement, flexible, and it’s dramatically reduced our food waste. I’ll spell out how I do it for you here. May it help you in your efforts to slay the What’s for Dinner Dragon!

    Personalize this guide

    I’m willing to bet your situation is not just like mine.

    Maybe you actually love to cook, or you don’t mind eating the same breakfast every single day, or you DO enjoy going to the grocery store. Maybe you don’t have kids at home so you’re cooking for just one or two people instead of half a dozen.

    Your main goal might be to:

    • Spend less money on vegan groceries

    • Make meal planning easier

    • Spend less time in the kitchen

    • Finally get around to trying some of those bookmarked recipes

    • Plan yummy meals so you’re eating intentionally instead of snacking mindlessly

    • Incorporate leafy greens and beans more regularly.

    Whatever you’re here for, you can use the principles below if you apply them to your situation. For example, before we had children, I only cooked 3 dinners a week, and I rarely decided what I would eat for breakfast ahead of time. And when we first changed our diet, we made the same meals from week to week because we didn’t have many we liked yet!

    But this approach to meal planning is flexible enough to work for this kind of dinner:

    as well as this kind of dinner:

    Get more from your time

    I love planning meals only once a month because I spend less time in planning and list-making, and it also significantly cuts down on the amount of time we spend going to the grocery store.

    Our favorite grocery store is a 15-20 minute drive away. Shopping there saves us hundreds every month on groceries, so it’s worth the trip, but I don’t want to make the trip any more frequently than I need to! Plus, shopping with kids can be a little… chaotic. Fun, yes, often. But chaotic for sure.

    groceries for plant-based kids

    We do a big shop at the beginning of the month and stock up on any pantry essentials as well as fresh produce for the first 10-14 days. Then we shop just for fresh produce an 1-3 times during the month.

    I make sure to store my produce properly and make my meals with more perishable ingredients first, which helps me stretch out my time between trips to the store, even while we eat lots of fruits and vegetables.

    Key #1: Plan three meals each day and snacks

    I used to think planning for all meals and snacks was too much work and too rigid for me, but I’ve found it’s the opposite! It’s brought a lot of peace of mind and more variety to our table with less effort overall.

    Because we eat 90% whole food plant-based and not much of what we buy is prepared, if I want to have food available for my crew I need to plan for it. Easy meals are made even easier when the stress of coming up with them on the fly disappears.

    Key #2: Repeat your breakfasts, lunches, and snacks

    At the beginning of every month, I write up 7 breakfasts, 7 lunches, and snack options. We will repeat those same meals and snacks throughout that month.

    I assign the meals to days that make sense with our schedule. This month it looks like this:

    Breakfast

    Monday: Steel cut oats with frozen berries or cherries

    Tuesday: Muffin & smoothie

    Wednesday: Steel cut oats with apples and cinnamon or pear and ginger

    Thursday: Something different (tofu scramble, breakfast potatoes, chia pudding, and black bean enchilada cassserole)

    Friday: Muesli with fresh fruit

    Saturday: Homemade granola

    Sunday: Muesli with dried fruit

    Of course yours will look different! There are lots of vegan breakfast options available online, and you’ll have to experiment a bit to find that intersection of easy and tasty. (Here’s why I think you should serve oatmeal if at all possible.)

    The idea of making the same thing predictably every Monday is a game-changer. There’s enough day-to-day variety to not get bored, and enough week-to-week consistency to make things run more smoothly. Plus, I only have to plan one week instead of four!

    Here’s what the top of my planning sheet might look like:

    (Far more talented people than I have created free printable meal planning sheets. Just google it and pick your favorite. )

    Making it even simpler

    We’ve had seasons where we eat oatmeal or muesli EVERY DAY to keep things simpler, with toast and fruit as an option if we need to mix things up.

    In fact, I’d probably always do that if it was just me, but my husband loves food and variety, so I add in some different things for different days when I can. I make a month of muffins at a time and freeze them, and a month of homemade granola. For right now, the above menu works for us, but be realistic about the season you’re in and pick meals that work for your family.

    You can just carry those same meals on from month to month, and only tweak for changing seasons or the addition of a new recipe occasionally.

    Lunches

    Leftovers are a go-to easy lunch option, and I try to send leftovers with my husband to work whenever possible. The rest of us used to almost exclusively eat leftovers for lunch as well. However, we’re a larger family now and it’s trickier now to cook enough extra food, and I’d rather freeze extra for an easy dinner in the future. So, we stick to low-key lunches and schedule them much the same way we schedule breakfast, repeating week to week.

    Of course yours will be different, but here’s this month’s lunch menu at my house:

    Monday: Veggie sandwiches

    Tuesday: Easy bean dishes two weeks, easy pasta dishes two weeks – (Mexican mess, homemade refried beans, pasta with lentils & jarred marinara sauce, creamy tomato basil pasta)

    Wednesday: Nut butter sandwiches, served with fruit and vegetables

    Thursday: Leftovers from Tuesday.

    Friday: Baked sweet potatoes

    Saturday: Leftovers from weekday dinners

    Sunday: pancakes or waffles (whole wheat sourdough pancakes twice, carrot pancakes, waffles) – Family tradition!

    Once again, I’m repeating lunch dishes all month, and I repeat them in future months with only a few tweaks here and there.

    Now my meal planning sheet looks like:

    Side Note: If you don’t already eat an entire baked sweet potato and call it a meal, it may be time to start.

    If I have “leftovers” on the calendar, and we don’t have enough leftovers in the fridge, I pull out what we do have and then add an easy staple to round it out (like refried beans from a can on whole wheat tortillas from the freezer.)

    One alternative is to make a big batch of soup on Sunday and have that for lunches most of the week. By all means, do what works for you. But I do recommend planning to eat!

    Snacks

    We’ve handled snacks differently over the years, but our two most common methods are:

    Plan one snack per day for the family and put it on the calendar.

    OR

    Let my kids decide on the content and timing of their own snacks. They choose one veggie snack and one fruit snack each day.

    When I calendar snacks, I do it like this, and I serve it up to everyone around 4 o’clock:

    Monday: Air popped popcorn

    Tuesday: Fresh fruit

    Wednesday: Veggies

    Thursday: Dried fruit and nuts

    Friday: Frozen fruit ice cream

    Saturday: Open-ended

    Sunday: Leftover waffles or pancakes

    Currently, we are doing the “serve yourself” option. My kids like being able to grab something when their hunger hits. I have a drawer in the fridge with fruit and veggies, and they just go ahead and cut things up on the fly (or ask an older sibling in the case of the 4 year old).

    Key #3 Choose dinners from category lists

    Dinners are so much easier to plan since I gave myself a framework. I plan on making 5 dinners per week, which seems to be about right for us when I take into account leftovers and the occasional meal outside our home. I also have two easy pantry soup recipes that I can make to round out the month when needed. 5 dinners a week may be too many or too few for your situation!

    Regardless of how many dinners you’re making each week, I recommend organizing your dinners around type (pasta vs. soup) and/or cuisine (Italian vs. Mexican). We usually do by type, like so:

    For each week I plan on making:

    • 1 soup

    • 1 salad

    • 1 pasta

    • 1 dish that’s served over brown rice or quinoa

    • 1 other dish (on a bun, in a wrap, pizza, etc.)

    That means for my whole month of dinners, I just pick:

    • 4 soups

    • 4 salads

    • 4 pastas

    • 4 dishes served over rice or quinoa

    • 4 other dishes

    The key to making this as easy as possible is to pull together your favorite recipes by category and make a list. I have a list of our favorite 20 or so soups, and the same for salads and each other category above. I only put things on the list that I’ve made several times, so I have a very good idea of which ones are easier and which are more time-intensive. It has to be extra delicious for me to make anything time-intensive in this season of life!

    Note to those new to plant-based or vegan eating: You may not have an extensive list of go-to recipes yet. That’s ok! You’ll get there. You’ll have to start out with trying more new-to-you recipes and/or eating many of the same dishes frequently. Perhaps every week you make the same 4 winners and try one new dish as you build up your list. My best advice is to pay attention to what you like and start keeping a recipe binder.

    To make my dinner plan for the month, I follow these steps:

    1. Check the freezer for any meals I’ve already made that I want to eat that month. Fist pump!

    2. Check the fridge for any straggling produce I want to use up, and keep that in mind for the next step.

    3. Skim the list of soups and pick ones that sound good, maybe that we haven’t had in a while, or are in season.

    4. Repeat this for the other categories.

    I also have a running list of recipes to try someday (by type), so I’ll sprinkle in some of these among our regular favorites, if I feel like it.

    Pro Tip: If I’m trying a new recipe, I print it out as I make my list or write down the cookbook title and page number, so I don’t have to hunt it down later in the month.

    Sifting and Sorting the dinners

    I go ahead and sort these 20 recipes into loose groupings by week so we have variety. That just means I’m not going to put the taco soup, taco salad, and lentil tacos in the same week, or the minestrone soup right next to the lasagne. If I had straggling produce to use up, I’ll put those meals at the beginning of my line-up.

    You’ll notice I don’t have dinners assigned to particular nights on a calendar. You absolutely can, of course, but I usually like to keep it flexible and decide at dinnertime the night before.

    I tend to put the “fresher” recipes that use fragile produce in the first and third weeks, and the pantry/freezer recipes in the second and fourth weeks. But, don’t stress about this unless you’re really trying to minimize shopping trips like me.

    Even Simpler

    My advice is to go with the simplest plan that suits your family’s preferences and situation. Here are some more ideas that may work:

    • I know moms who have between 1 and 3 months of meals and just repeat or rotate between them. That means they don’t even have to re-make the shopping lists! Brilliant, but not a good fit for me because my husband enjoys more variety than that, and we like to change things up for different seasons.

    • You could have two weeks worth of dinners and repeat them to make a whole month.

    • I also know moms who just keep a list of their favorites in each category right there on their printable menu plan and simply circle 4 for each month.

    • Cook just 3 times a week and always make double. You could freeze a couple of the meals, and pull out different meals from your freezer, so you end up with more variety in your week without actually having to cook more often.

    Key #4 Make Easier Shopping Lists

    I want to make getting the meal plan translated into a shopping list as painless as possible. Here’s what works for us:

    I make two shopping lists each month. The first is for my once-a-month big shop, and the other is for the 1-3 produce runs I make later in the month

    The Big List

    During the month

    I like to keep at least one backup of infrequently exhausted everyday items (mustard, soy sauce, etc.) in the pantry, and whenever I open the “extra,” I add that item to my BIG shopping list. This means I hardly ever run out of anything essential mid-month, and all of these random items are already on the list by the time I am ready to meal plan.

    I just have a “Note” on my iPhone, split into Costco and Winco, because those are the two stores I shop at. I add the item straight to the appropriate store’s list.

    Right before I meal plan

    I personally also prefer to keep “plenty” of our often used shelf-stable and freezer items on hand. That means when I add meals to my meal plan, I don’t need to account for each box of pasta or jar of diced tomatoes on my list. I always have those on the shelf ready to go.

    To maintain a well-stocked pantry, I simply walk around my kitchen and pantry once a month and open the cupboards and the freezer. I glance at the level of all my staples, and if anything is at least half depleted, I add it to my list to stock up on. It takes 5-10 minutes and it gives me a lot of peace of mind. There are so many pantry meals I can make anytime when someone needs a meal dropped off, we have last-minute guests, or we don’t get to the grocery store when we thought we would.

    Here are the things I always keep plenty of for my family and the plant-based diet we eat:

    • whole wheat pasta of different shapes
    • whole wheat flour, cornmeal
    • rolled oats, rolled multigrain blend, steel-cut oats
    • brown rice, quinoa
    • beans & legumes
      • black, white and garbanzo beans, both dried and canned
      • kidney beans, canned
      • pinto beans, dry
      • green split peas, red lentils, brown lentils
    • plant-based milk (unsweetened soy)
    • tofu
    • canned vegetables
      • tomatoes (sauce, paste, stewed, crushed and diced)
      • pumpkin
      • salsa
      • marinara sauce
    • Long-storage vegetables
      • onions
      • red onions
    • canned fruit
      • pineapple
      • applesauce
    • dried fruit
      • date crumbles
      • dates
      • raisins
    • nuts and seeds
      • walnuts
      • almonds, sliced and whole
      • sunflower seeds
      • pecans
      • cashews
      • flaxseed
    • frozen fruit
      • berry blend
      • “smoothie fruit” – mangos, strawberries, or tropical blend
    • frozen vegetables
      • corn
      • peas
      • mixed

    When I meal plan

    When I add a dish to my meal plan, I am only concerned with ingredients that are fresh produce and/or “special” in that I don’t keep them stocked. So, I just jot down the following:

    Any non-typical pantry items. I keep a well-stocked pantry, but if a dish requires something I don’t keep on hand, I’ll note that on a running list that combines all recipes. That would include frozen food, bulk bins, etc. Anything that will keep a month or more that I don’t keep on hand. So I might add:

    • pumpkin seeds, 1 lb
    • dried apricots, 1 lb
    • udon noodles, 2 packages
    • fire roasted tomatoes, 4 15 oz cans

    Any fresh produce items. I split these up between my BIG monthly list, and our mid-month produce list. I’ll note what it’s for as I go.

    • Red bell peppers- chickpea romesco (3), vegan chili (2), fried rice (1)
    • Green onions- Pad Thai (1 bunch), cowboy caviar (1 bunch)

    Rounding out the shopping lists

    I also always have the following two items on my both my BIG list, and my mid-month produce list:

    • fruit

    • snacking vegetables

    In our family, these items are shopped for as follows:

    • always bananas, preferably bunches in different shades of green and yellow
    • plenty (~2 weeks) of other fruit that’s a good price. For us, that means $1/ lb or less and usually includes apples, pears, oranges, and/or grapes ($1.50/lb) depending on the time of year. Also some seasonal fruit like pomegranates, watermelon, etc. All of this is decided by price and availability once we get to the store.
    • vegetables for snacks and sandwiches – this might include cucumbers, bell peppers, snap peas, green beans, baby carrots, celery (depending on price and availability. This is in addition to any required for recipes.)

    Example Lists

    • Fresh fruit and snacking vegetables (as above, but enough to cover the first two weeks of the month)
    • The special produce needed for the first ~10 dinners, and any special produce needed for breakfasts and lunches (less common). I note these as I choose recipes for the month.
    • The special non-produce items I need for the meals for the whole month. The mid-month produce list gets produce from the next chunk of meals.The random things from my pantry that I like to keep an extra of, like mustard or soy sauce.
    • Pantry items that are running low

    I’ll walk you how I’d add to my shopping list for the above mentioned breakfast menu:

    Monday: Steel cut oats with frozen berries or cherries – We always keep both frozen fruit and steel cut oats on hand, so I don’t need to add anything to the list.

    Tuesday: Muffin & smoothie – Unless I’m making a particular kind of muffin, I always have baking supplies on hand, and “always bananas” is practically a family motto, so we’ll get those at the store automatically. Ditto for the smoothie, unless I’m trying a special recipe, all I need to add to the BIG grocery list is: fresh spinach! I’ll go ahead and add this to my mid-month produce list as well, since I’m making smoothies all month.

    Wednesday: Steel cut oats with apple and cinnamon or pear and ginger- Again, we have steel cut oats on hand and we always buy either pears or apples or both as part of “fresh fruit.”

    Thursday: Something different (tofu scramble, breakfast potatoes, chia pudding, and black bean enchilada casserole) – Since I’m feeling fancy this month, I will need to look at the recipes for these and add the fresh ingredients to my produce lists – tofu, potatoes, peppers, an orange, cilantro, etc.

    Friday: Muesli with fresh fruit – Apples are always on the list, and we keep rolled grains and soy milk on hand. We just use whatever additional fruit we have that week, so it doesn’t go on the list specifically.

    Saturday: Homemade granola – I make this from dried fruit, nuts, and rolled grains, which… you guessed it, we keep on hand.

    Sunday: Muesli with dried fruit – Here again, we keep everything needed as a pantry staple.

    Dinner Prep

    My biggest and best tip for dinner prep is just this: Check (or decide!) what’s for dinner the next night as you clean up the kitchen from the current dinner. Glance at the breakfast and lunch plan while you’re at it.

    That’s it! Such a great habit that took me forever to develop.

    That habit will allow you to pull things out of the freezer, soak the beans, chop something quick, pull out the recipe and set it on the counter… any little thing will help develop momentum in the right direction.

    For me, the deciding is the biggest hurdle. I personally do not assign meals to specific days more than a few times a week (for guests, a busy night, or another specific purpose). Otherwise, I decide the night before from my list of dinners coming up. I pick the dish with the most perishable ingredients that sounds good and doable.

    One more tip: I try to look ahead before I clean up a kitchen mess. If I have the flour out I can prep my bread loaf for the morning. If I have a cutting board out I can chop fruit for tomorrow’s breakfast or veggies for tomorrow’s lunch. I do think it’s more efficient, but importantly, it clears a psychological hurdle for me to have something “already started.”

    Mid-Month

    When I’m down to just a few dinners left to make and our fruit and vegetable stores are starting to wane, I start prioritizing eating up the last of our fresh produce. Then I look at the mid-month produce list and tweak it as needed. Sometimes there might be one or two non-produce items that came up despite my best-laid plans.

    Then I add, just as I did for the BIG list:

    • fruit

    • snacking vegetables

    So my list is already made and when we head to the store, I usually only have to shop the produce department. It’s a faster and easier trip.

    Success!

    If you’ve made it this far and followed along, you have two ready-to-go shopping lists, 84(!) meals planned, plus snacks. You’ve also practiced a skill that will help tremendously with future months as you work to consistently keep your pantry stocked, your table full of plants, and your family fed and happy.

    It takes me about 1 hour once a month and saves me an incalculable amount of stress. It also saves money, extra trips to the store, and wasted food.

    That means more time enjoying my family and less time wondering what the heck to feed them!